With the release of Raspbian Jessie and a built in GPIO Scratch server, I’ve updated my beginner’s PiStop and Scratch worksheet for use with the newest Pi OS.
This worksheet is designed to be used as an introduction to inputs an outputs and requires some discussion from a teacher or workshop leader about how you define inputs and outputs.
You will also need to set up the PiStops in advance on pins 17, 27 and 22 (as demonstrated on the BCM diagram on the sheet).
Hour of Code has become a global phenomenon, but with excellent resources and celebrity support, it comes as no surprise. Several websites are now running their own Hour of Code projects, but I want to look at the ones on the official site as I’m really impressed with their offerings this year.
Earlier in the year I talked about the Frozen resources and mentioned that while it is an excellent resource, it gets quite tricky near the end. I’ve noticed that in the meantime, they have addressed the issue of calculating angles being too tricky, by adding in information about the necessary angles in the description for each level. However, some of the children in my school completed both of the new resources and then tried the Frozen one and all agreed that Frozen was still the hardest of the lot.
So, Minecraft is exceptionally popular amoungst the children in my school and, with the approaching launch of the new Star Wars movie, this too proven to be a popular choice.
In the Minecraft puzzle, the children are given the choice of playing as Steve or, his female counterpart, Alex. This is a nice start as it acknowledges that children of both genders will be giving this activity a go.
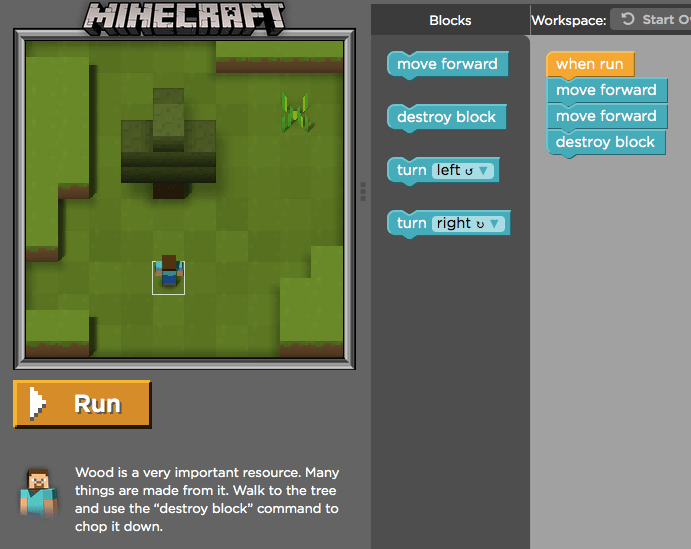
As with the previous activities, you are shown a video, this time it’s from one of developers of Minecraft, who explains the activity ahead.
The code is based on blockly and introduces it’s concepts in a slow and simple manner. Once you’ve figured out of the system works, you are introduced to concepts such as shearing sheep, cutting down trees and mining resources by using ‘destroy’ blocks in the code.
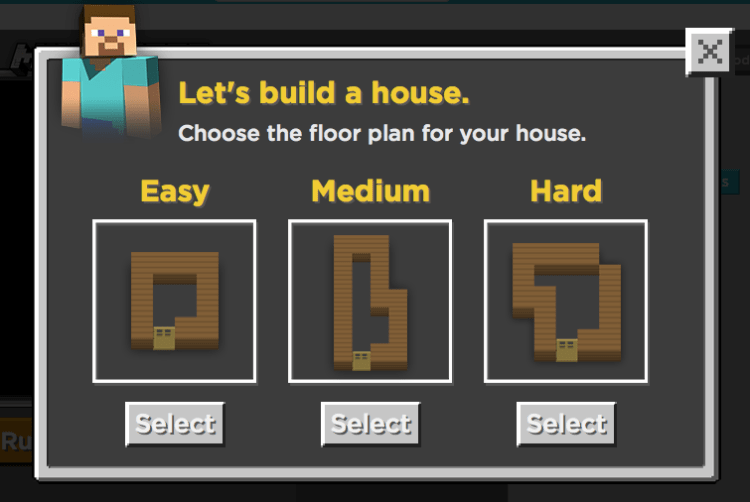
I really love that when you get to level six, you can chose a difficulty level for building the foundations of your house.
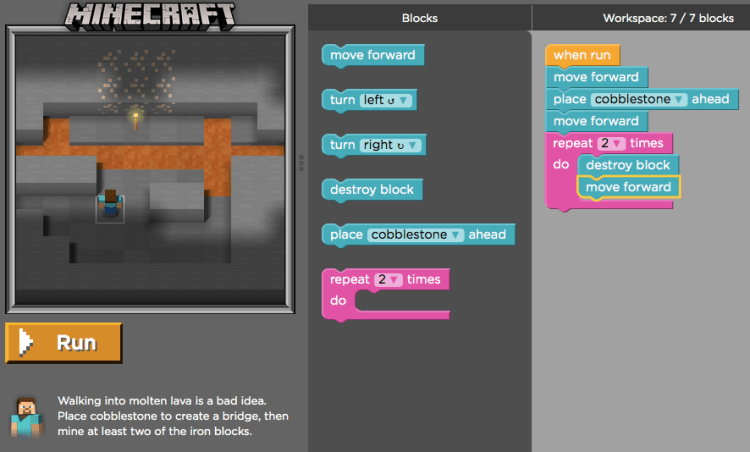
We’ve just been introduced to the repeat block and the activity begins by giving us some basic code, which we are expected to modify to complete the design. The code we are given at the start won’t build our house, but with the addition of some further loops, we can complete our house.
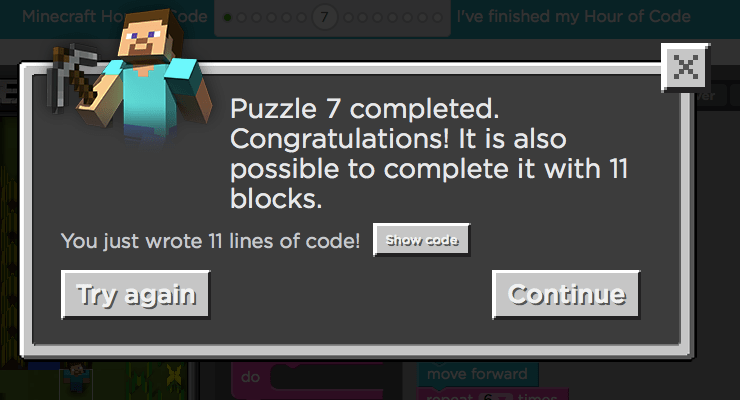
In the Frozen code, we are usually given a limit on the number of blocks we can use for each activity, which is to encourage us to use loops effectively, but so far we haven’t been given a limit for the Minecraft code, but this changes in level 7:
The limit is not enforced, and if you exceed it, you are politely reminded that you could do it more efficiently.
If you don’t finish the activity in the required number of blocks, your status bar shows a slightly lighter green colour, which means that, as a teacher, I can clearly see who has carefully completed the activity and suggest that children look again at certain bits to try and make their code more elegant.
The activities involve a number of blocks unique to this activity such as ‘place cobblestone’ or ‘shear sheep’ and I think this is useful for children to see as they can recognise that code can be altered to suit the situation.
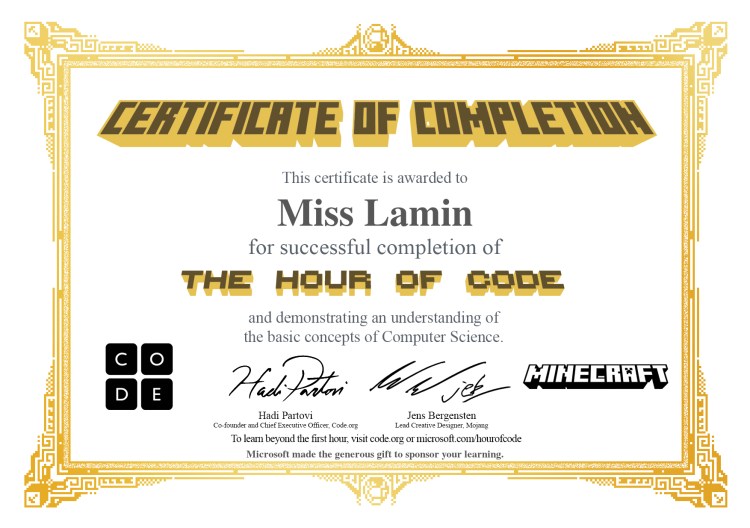
Slightly different to the other Hours of Code, if you complete the Minecraft activity, you get a special Minecraft themed certificate, which the children really love!
So, what are you waiting for? Give the Minecraft hour of code a go!
In the summer of 2014, I tirelessly tried out various resources and blogged about them as I went along, but this summer, I wasn’t able to blog as much for one simple reason…
I spent most of my summer holiday trying out new resources and rewriting existing pieces to create a simple guide to get teachers started with teaching coding.
I’ve tried to fill it with ideas and guides so I hope some of you get a chance to look at it and can let me know if it’s of any use!!
So, now that it’s in iBooks store, hopefully we’ll be back to business as usual!!
Tomorrow I will be running a workshop for MozFest, a massive community event in London organised by Mozilla. Young Raspberry Pi enthusiast, PiNet creator and all round evil genius Andrew Mulholland somehow found himself organising a Rasperry Pi Zone at the event (I definitely had no involvement in this whatsoever) and so he coerced/bullied me into helping out.
This will be my first time running a workshop by myself for strangers (working with children you’ve known since they were four really doesn’t count) and I’m a little bit nervous, but I am pleased with the worksheet that I’ve created, so I figured it was worth sharing it with you guys. If you’d like to take a look, it can be found here. Please feel free to take it and use it in your own classrooms if you think it’s useful.
I’ve tried to make the worksheet easy to follow and easy to use with minimal resources – you need a Raspberry Pi with either Scratch GPIO or Raspbian Jessie, a PiStop, a PIR sensor and some female to female cables and that’s about it!
I’m planning on introducing the workshop by taking about the Pi and what you need to get it started; it never ceases to amaze me how little children know about the actual parts of a computer and most of them think that the monitor is the computer itself, so I like to spend time talking about what the parts do – the screen is so that you can see what it is thinking, the the mouse and keyboard are so you can control how it thinks, the SD card is it’s brain so that it can think and store memories, if you want to hear what any sound you need to plug in some speakers, if you want it to connect to the internet you need to give it a wifi card etc. The whole point of the Pi is to help children understand computers better so let’s make sure we’re using it properly!
You’ll be pleased to hear that I’ve forced myself to cut back on extra curricular activites after this weekend so hopefully I’ll have a bit more time to blog and try things out – I have so many toys in my collection ready to go!!
Thanks for reading and I hope the resources is of use to you!
After another year at Pycon and really throwing myself into the coding community with my coding evenings and any other events that have caught my eye, I find myself reflecting on the purpose of teaching coding within a primary school. What do we hope to achieve by teaching complex languages like Python and Ruby? Why do anything other than Scratch? What do teachers really need to know to teach coding effectively?
In my own practice, I can say with confidence that I’ve made numerous mistakes trying to teach code, but one thing that became increasingly clear to me over last weekend was that it’s not WHAT languages of code you’re teaching that is important, it’s HOW you are teaching and whether you are demonstrating and modelling good practice to children yourself.
So, why are we teaching coding?
My understanding of coding as a subject has grown this year and I am now confident that teaching coding teaches children a number of critical thinking skills, not least of which is problem solving and error correction. If you’re using pre-packaged kits like Espresso Coding, you’re not going to be stressing these independent skills so it’s important that you allow children creativity in their coding.
This brings me nicely onto my second point…
What if the teacher doesn’t know much about coding?
One thing I realised over the weekend was that no one expects coders to know everything about coding. A lot of writing a programme is all about borrowing and modifying someone else’s code to suit your purpose and I think it’s really important to model that to the children you’re teaching. I make it clear that I’m learning to code with them and, if something isn’t working, we both look it up together and find some existing code to play with and fit to our purpose! Teaching doesn’t have to be someone stood at the front of the classroom pouring knowledge into their class’s heads…in fact, as adults, we constantly seek to further our knowledge by looking things up and investigating new ideas and outcomes, so why shouldn’t we model this for children? And hey, why not throw in a quick lesson on why some sources on the internet might not be as useful as others because of their source, their age or their content while you’re at it!
What languages should we introduce in the primary school?
There are lots of arguments floating around about what we should be teaching and why. I teach Python, Scratch and HTML in my primary school, but I don’t teach them as a separate and complete unit, rather I introduce the children to key concepts through playing and trying out projects if they feel ready to move on from block-based languages. I let the children make their own way through Codecademy *if they want to*, but I’m also happy for children to carry on using Scratch as long as they can achieve their purpose with it. My point about using Codecademy is that it isn’t an amazing tool for learning to code, but what it is, is a great way to learn some basic language as well as to encourage children to start supporting and debugging each other. It is only through ‘fixing’ someone else’s code that I learnt some of core ideas and the same is true with the children.
I also like to give children Python code for the various hats on a Raspberry Pi or for hacking Minecraft, but the purpose of doing this is firstly to encourage accuracy, but more importantly, to encourage the children to make changes and discuss what each line of the code actually achieves. It’s no good getting your children to blindly copy the code and then walk away claiming to know Python because they got blue flowers to follow Steve around the map.
Saying that, this is also true of Scratch – if you asked your children to create a platform game in Scratch without any instructions, would they be able to? Do they rely entirely on copying the information from the Code Club worksheet and then just walk away at the end or are they capable of manipulating their code to make something new and unique happen?
I am concerned that too many schools will suffer ‘death by Scratch’ or, even worse, ‘death by Espresso Coding’ by repeating the same, boring exercises over and over again each year without any practical application or opportunity to change the code and make it their own. It’s important that we are not just ‘teaching’ languages of code by following schemes of work and worksheets, but that we, as teachers, are thinking of innovative and interesting ways to use code to achieve an end goal.
Coding is a fantastic skill that can be used to achieve a broad range outcomes regardless of whether you are sticking to block-based code or moving on to a text language like Python, but only if we encourage creativity and playfullness with our code in the same way that we encourage creativity with our story writing.
So, there’s no surprises here, teaching code isn’t just about finding the best and most cutting edge resources, it’s about teaching effectively and modelling to the children, managing your expectations and encouraging them to be independent learners. What matters most is that you let children know that’s ok to get things wrong, it’s ok to look at other people’s ideas, it’s ok to not know everything straight away!
Enjoy teaching coding and make your classroom independent, interesting and fun; allow your children the chance to play, have fun and join in yourself. It shouldn’t just be the children that are enjoying your lessons about code!
So, last year I spent my summer writing blog posts left right and centre and I have so many new products to try out and blog about, but I have a huge apology to make first… Basically, I started to write a short iBook about how to begin teaching primary coding which was aimed at primary school teachers like myself…this quick guide has slightly taken over my life and is now just shy of 50 pages with several sections left to go. Once I’ve got a first draft written and checked then I can pull my finger out and start blogging again, but just to wet your appetite, here are a few of the things I’ve got to blog about:
Hopscotch – block based coding on iPad
Gemma – arduino based wearable tech
Codebug – I’ve got one arriving in the post any day now
Mozilla learning platform
Explorer Hat Pro, Displayotron 3K and Unicorn Hat
So, you can see that I have a couple of bits & pieces ready to go in my pile of stuff to review, it’s just finding the time!! Please bear with me while I slog my way through permissions and acknowledgements not to mention glossarys and introduction videos!
So, this post isn’t specifically about coding in the primary curriculum, but I wanted to share with you nevertheless.
Last week I spent a week in The Netherlands courtesy of Apple who selected me as one of their distinguished educators for 2015. The ADE programme has been running for 21 years, since 1994, and there are currently over 2000 ADEs across the globe who are using Apple technology to support teaching and learning. This year, they selected around 650 worldwide, 50 of whom were from the UK, and these educators were invited to attend an institute in either Florida, Amsterdam or Singapore.
How are teachers selected?
In order to apply to become an ADE, teachers are required to answer 4 questions (within a specific character limit) and create a 2 minute video to share their story with the team. The idea is to show how you are making a difference and how Apple has helped in some way. For my application I focused on my community support work with Coding Evenings and supporting teachers within my school and the wider community. I mentioned use of iPad within the school and how 1:1 deployment has changed the way children study. For my video, I focused on the changes I’ve made and how I support people in my school – if you really want to see it, you can find it here.
My impression, from talking to other people there, was that Apple selected teachers who were collaborating, inspiring, innovating, supporting teachers and communities and making a difference to more than just their own class. The people who are seeking out new and innovative technologies that can truly make a difference to teaching and learning and are reaching out to share what they are doing with those around them.
What can you expect?
The first thing I found from joining the ADE community was that I had a ready made group of friends – there were lots of people who were keen to share their ideas and practice. There were lovely people as excited as I was to meet each other and one lovely teacher from France suggested we all bring souvenirs from our own country for a gift exchange. On the community site, I found a primary school teacher from Lincoln on the same flight as me and we headed off for a week in The Netherlands.
When we arrived at the hotel we were surrounded by loads of people wearing matching lanyards; we were all given a badge, jacket, t-shirt and itinary on Filemaker Pro and told to make sure we had our lanyards on display at all times.
The institute didn’t start until Monday, but we arrived on Sunday to have a chance to get to know each other, and it was a welcome opportunity to relax and get used to our surroundings. On Monday morning, we were in the hall by 7.45am and ready to start. Each morning started with some very loud house music pumping into the hall, which was overwhelming at first, but become completely unconcerning by day two.
Part of our first day was to split into learning communities – the presenters were keen to stress the importance of selecting a community that reflected your passions and not just what you teach and so, by lunchtime on day one, I found myself labelled as group leader of the primary coding group – 11 educators from around the EMEIA region (Europe, Midde East, India and Asia) with a similar passion for code.
There were a few activities that were focused on corporate stuff (correct use of the Apple logo, guidelines on creating iBooks in the Apple style) and presentations on Apple software, which encouraged me to think more carefully about some software that I’d previously dismissed, but the best and most interesting part of the whole week were the showcases by new and existing ADEs letting us know what they were doing to inspire other teachers and learners. All of the showcases were interesting and fascinating, but one or two were truly inspiring – my particular favourite were two women from the Czech Republic working in a special needs school and using iPad to support learning (they had me in tears with their story).
I also met some really wonderful educators that I plan to stay in touch with and share ideas with – I already can’t wait to meet up with them again. Special mention to my room mate for the week, Sarah Jones, who is using technology to bring together journalism students from around the world in a collaborative and interesting way; Benji Rogers, who supports and trains our next generation of teachers at Plymouth University whilst being a real life magician; Caz Barnes, a primary computing teacher in Geneva using green screen to make learning in Geography more interesting; Tim Lings, an inpiring techy teacher from London, who can moonwalk like a pro and last, but by no means least, my plane buddy and all round amazing teacher and amazing person, Chris Copeman, who kept me sane no matter what else was happening during the week.
Apple let us play with a load of third party tech such as Sphero and Dash, which can be controlled from an iPad as well as some other really cool tech and I’m already thinking about better ways to integrate this into my teaching in a cross curricular way.
I know there is a lot of anti-Apple sentiment out there, including some in the Pi Community, and I know some people will assume that the week consisted of a load of fans who love apple and love everything about them, but actually I felt like it was more about creating a learning community and collaborating with peers. Yes, there was a focus on Apple devices, but at the end of the day, the most important thing was about getting together and sharing what works. No one blinked an eye at me setting up a Raspberry Pi to demonstrate, in fact, a couple of the Apple staff came to take a look at what I was doing! I wouldn’t describe myself as a massive Apple fan, but I like my MacBook Air and iPhone and I like what they’re trying to do – I went in with my eyes open and was fully prepared to become annoyed with an overwhelming corporate message, but that just wasn’t the case. It was a lovely opportunity to meet some truly inspiring people as well as playing with some great resources and I’m so grateful to Apple for giving me a chance to meet them in such a lovely, friendly atmosphere.
So, if you are using Apple tech in an innovative way, consider applying because it really is an opportunity not to be missed.
As some of you may have noticed from my twitter, I’ve recently been invited to talk a couple of times about the things I’ve been doing since I attended Picademy last year. Firstly, I went to Egham Jam and met the lovely Albert Hickey, as well as a bunch of lovely and enthusiastic Pi people. Albert was showcasing his mind reading, flappy birds game, which had decided not to play ball, but was still interesting nevertheless. I also took a look at Seven Segments of Pi – a simple DIY introduction to coding and making, which really interested me and, when I have more time, I will definitely be taking a proper look. I was realy grateful to have the opportunity to talk to a room full of people which included school governors, children and makers. There were lots of questions, mostly from governors, who were really keen to get their schools involved with Coding Evening.
My next stop was day two of Picademy in Cambridge, where Carrie Anne Philbin had invited me to speak to the current cohort of RCEs about my journey over the last twelve months. It was a strangely exhilerating experience for me since it was exactly a year to the day since I attended Picademy and it was so refreshing to feel the energy and enthusiasm in the room. What I was not expecting was for Carrie Anne to tell the ‘students’ that I’d be on hand to do some primary level Scratch projects should anyone want to do that for their independent project so I was a little bit anxious when I sat down with two lovely ladies, Gill & Carol, to come up with a project that they could take home and show to their headteachers and demo easily in the staffroom. They both insisted that they wanted to use only the resources they had been given in their goodie bags, so we were lucky that they’d been given both a PiStop and a CamJam EduKit.
Without any input from me, the ladies came up with a project that I’d been looking at for a number of months, but still hadn’t put into practice: using Scratch with the PiStop, then the EduKit to demonstrate how to use a breadboard to create a circuit.
For the first part of the project, I knew what to do so I let the ladies work it out themselves, with a few gentle nudges from me; I was so impressed with their attitude and willingness to give things a go, especially with the difficult task of wiring up the breadboard. Just as we got it all working, Carrie Anne came in with a PIR sensor so that we could make our traffic lights sensitive to motion. All credit goes to James Robinson for help with Scratch as well as Martin O’Hanlon who helped us to solve the problem of how to detect someone jumping the lights! The ladies were really pleased with their final project and couldn’t wait to take it back to school; I felt so excited and proud to have been involved and to help inspire them further.
I was also really pleased with the overwhelming interest the other RCEs had in my Coding Evening project – there were at least three people who were keen to start their own and I’m really excited to be able to support teachers and other community groups with sharing their learning and ideas.
So, I’ve attended Picademy for the second time and, once again, I’ve left feeling ultra enthusiastic after meeting a great bunch of people who are all so eager to teach the new curriculum properly. I loved my first experience at Picademy, but I loved my second experience too and it still counts as my best training EVER. If you’ve not applied yet, make it your first priority next term – convince your SLT to let you take a couple of days off, do whatever it takes to get yourself up to Cambridge, or wherever else the course might be.
So, a final note, on Sunday, I fly over to Amsterdam to take part in ADE training with Apple (Apple Distinguished Educator) and I plan on wearing my Raspberry Pi Certified Educator badge with pride.
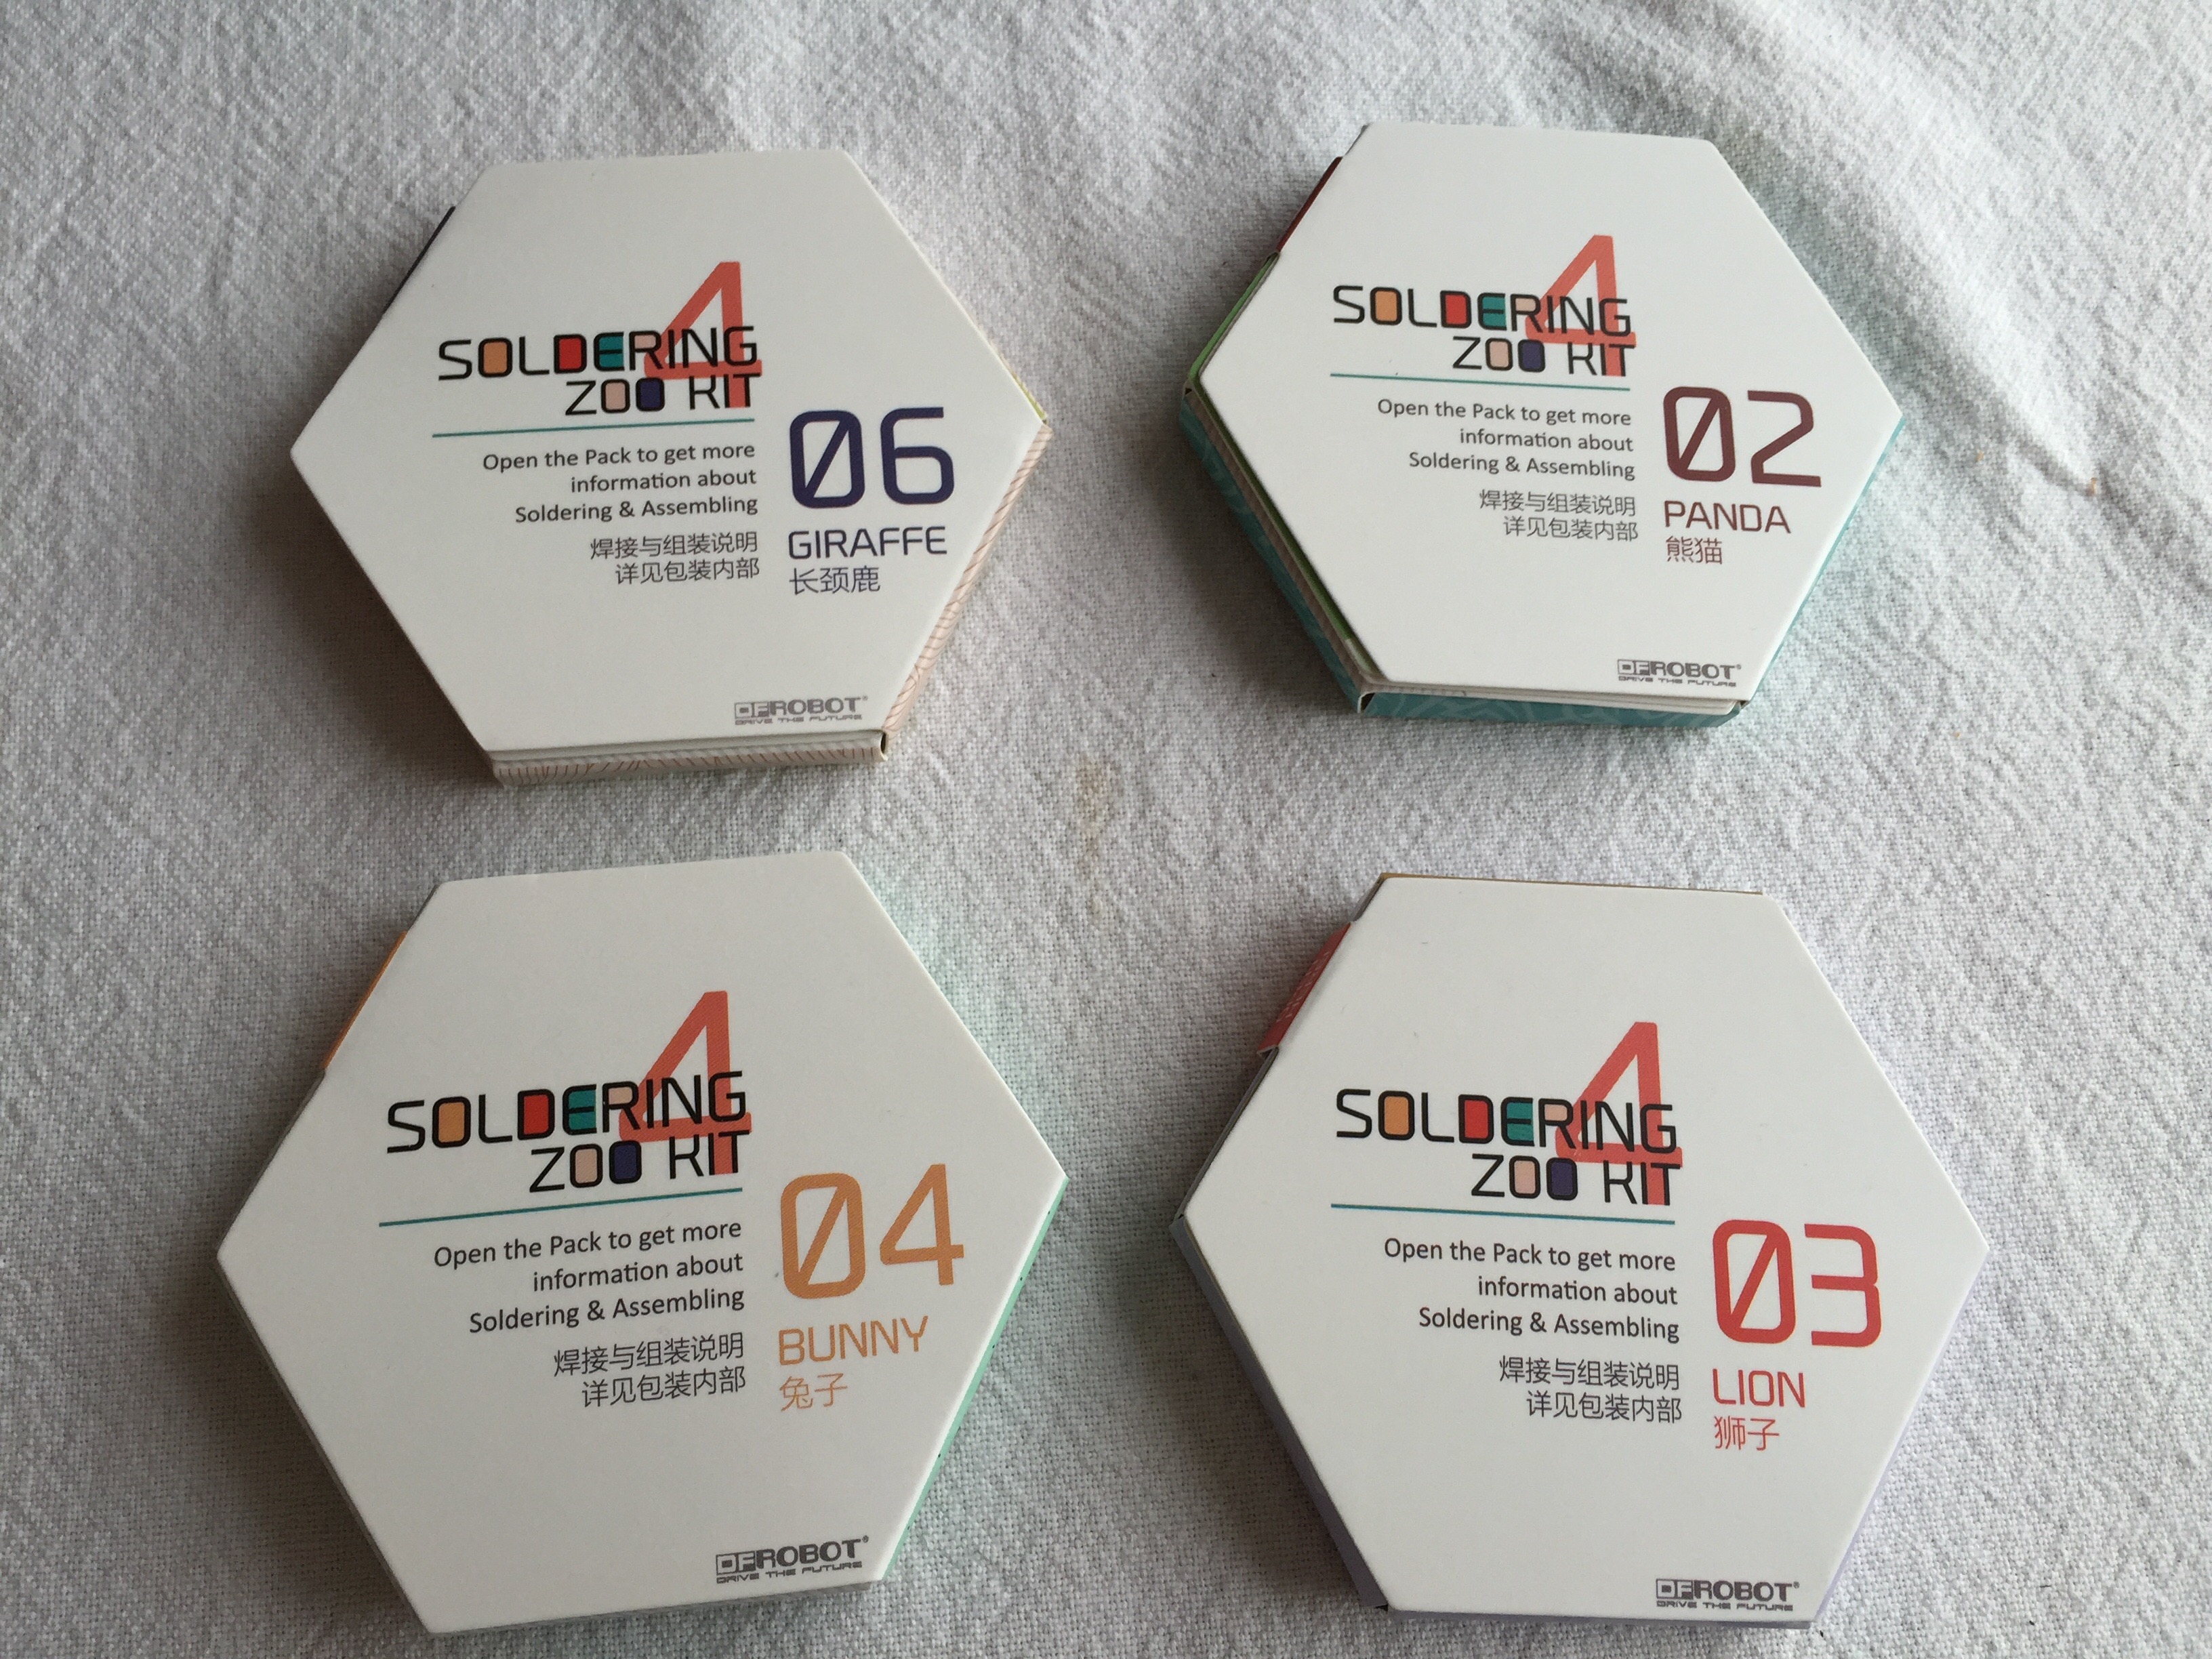
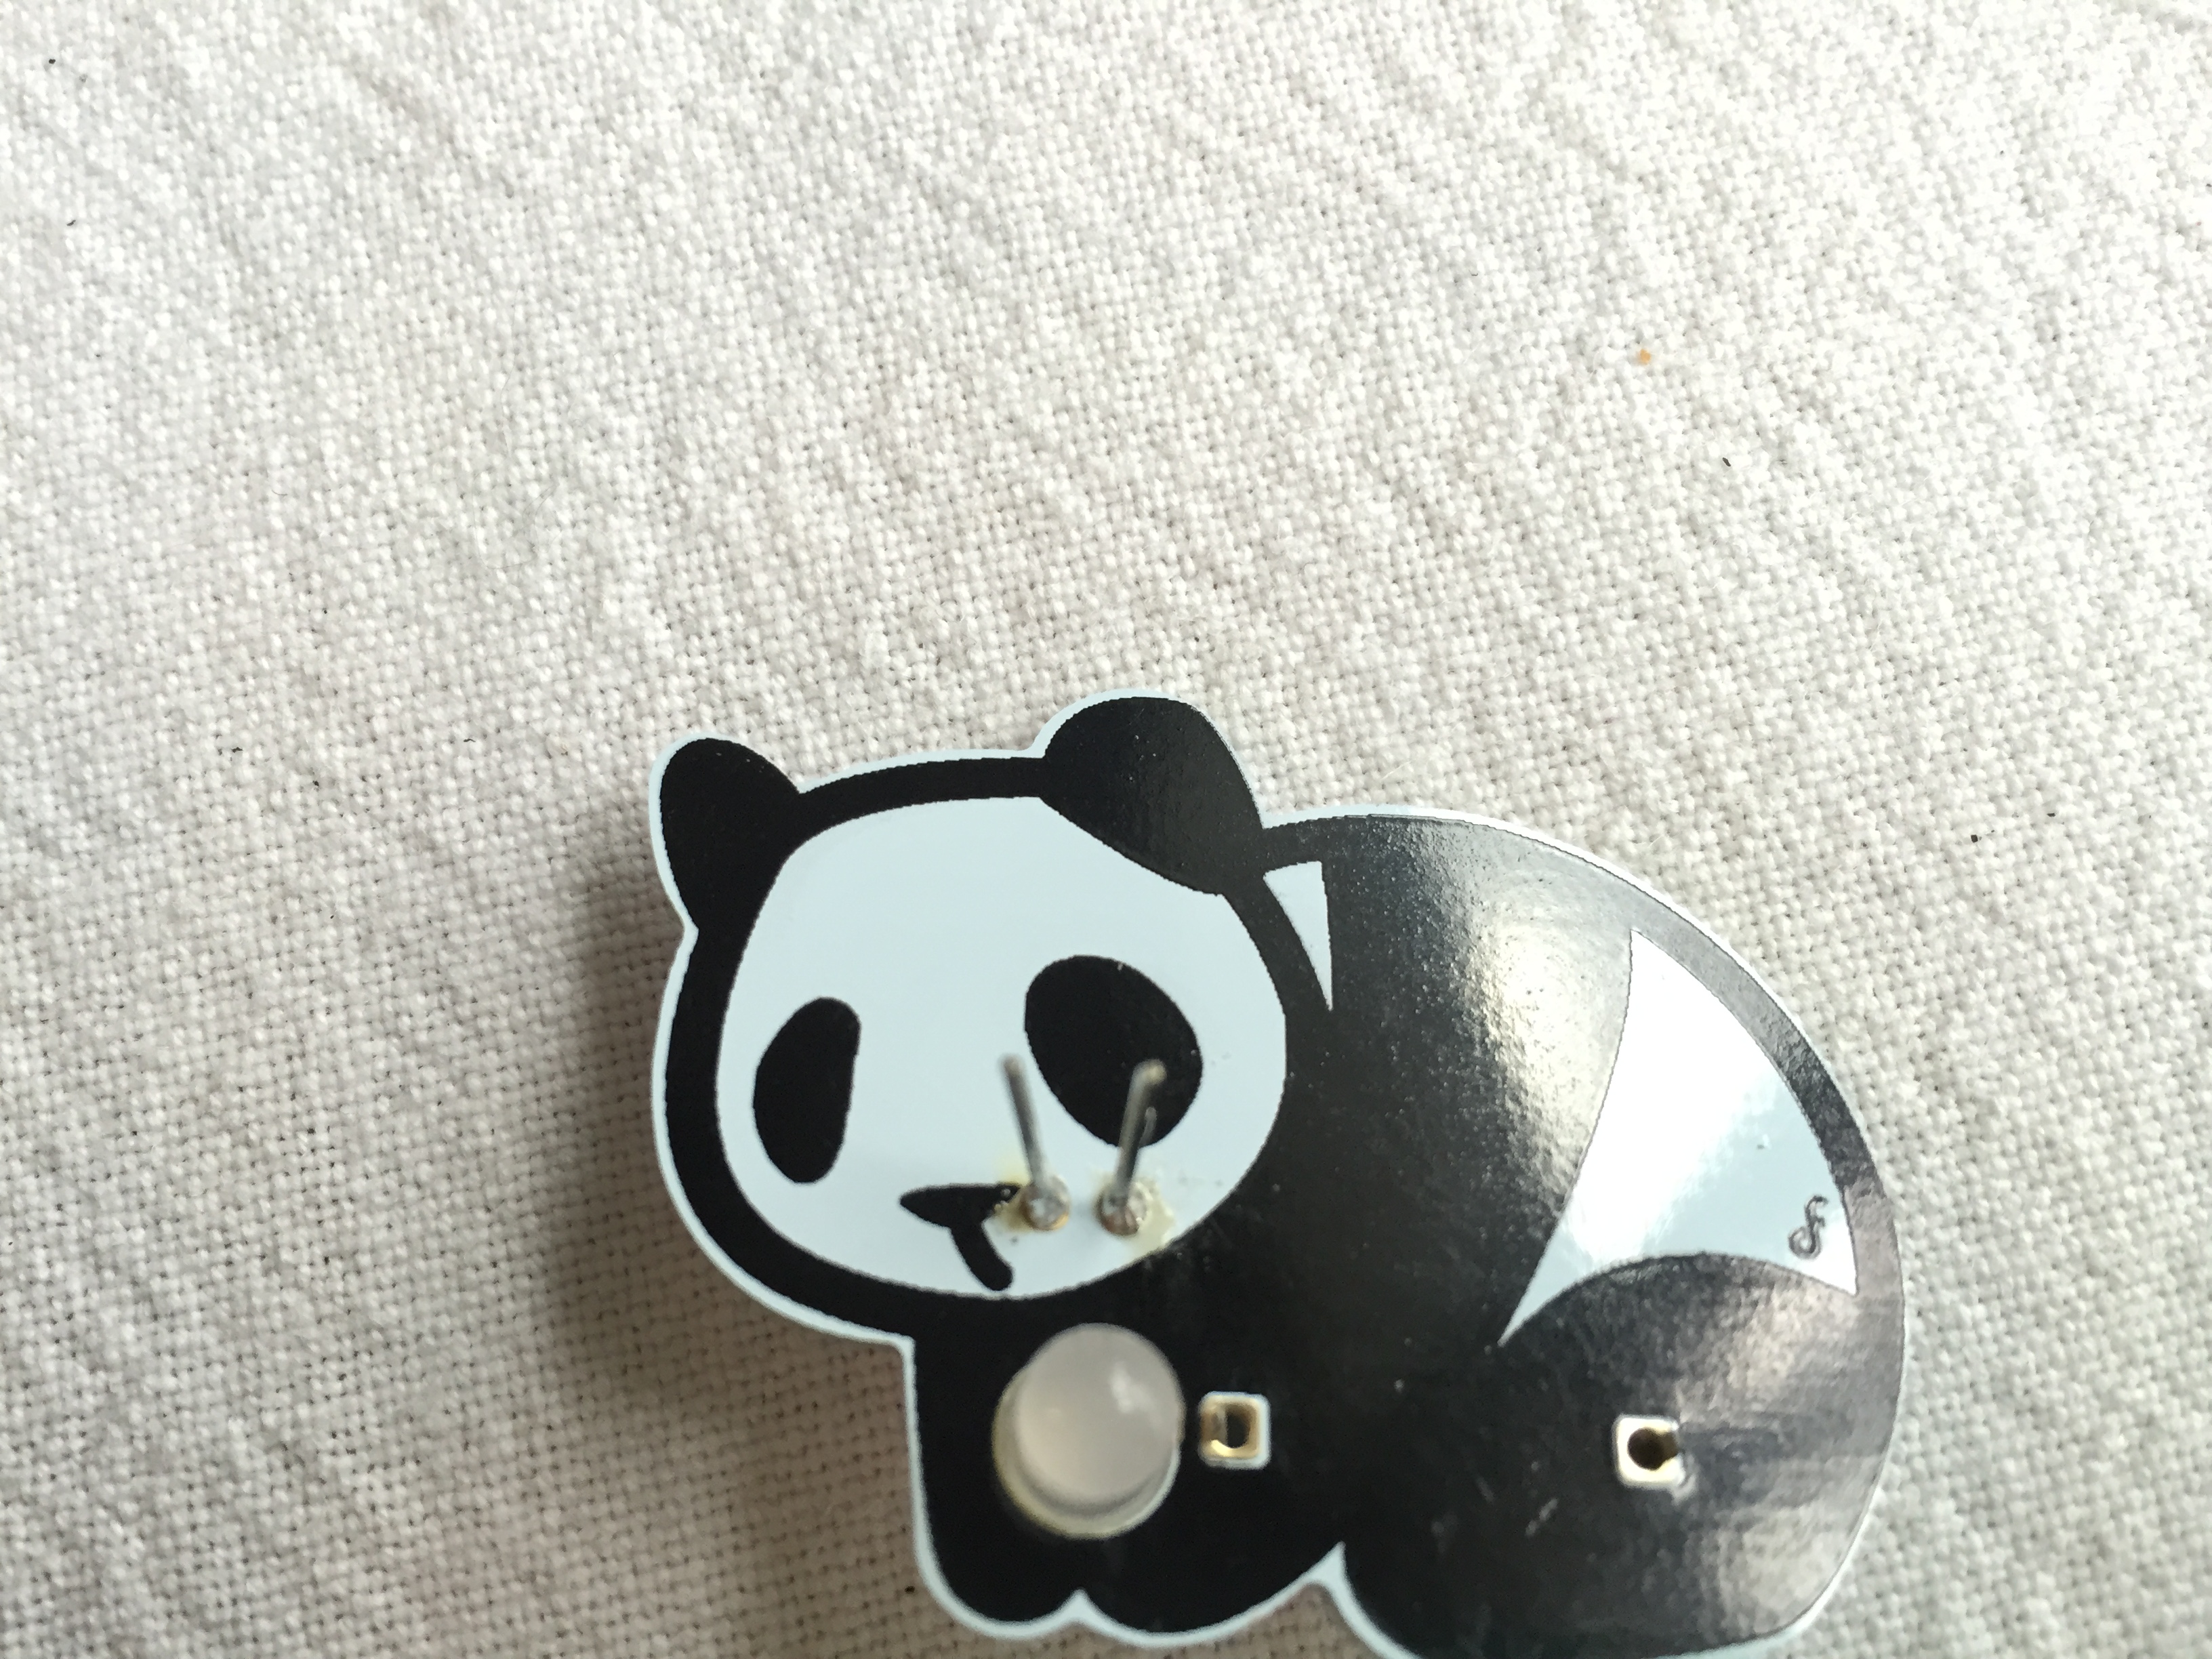
Last weekend I went to CamJam and I was very impressed with some small soldering kits that Hannah Mills had bought from The PiHut called Learn to Solder Zoo Badge. I was absolutely gutted that they had already sold out, but fortunately they had plenty in stock on their website. At only £2 each I quickly ordered 4 different badges and eagerly awaited their arrival; the kits come in a variety of designs: Llama, Panda, Lion, Bunny, Sheep and Giraffe. Once I had my hands on them, I planned to spend an hour or two learning to solder, but it turned out that I really didn’t need that long at all!
So let’s start off with what’s inside the kit:
You will see that the kits come in a small hexagonal package which will fit easily into the palm of your hand. the kit is designed to cut and fold into a display case for your badge, which is a nice touch and the instructions are entirely graphical with very few words.
I’m pretty lucky to have a soldering geek at home to help me so he talked me through how to solder.
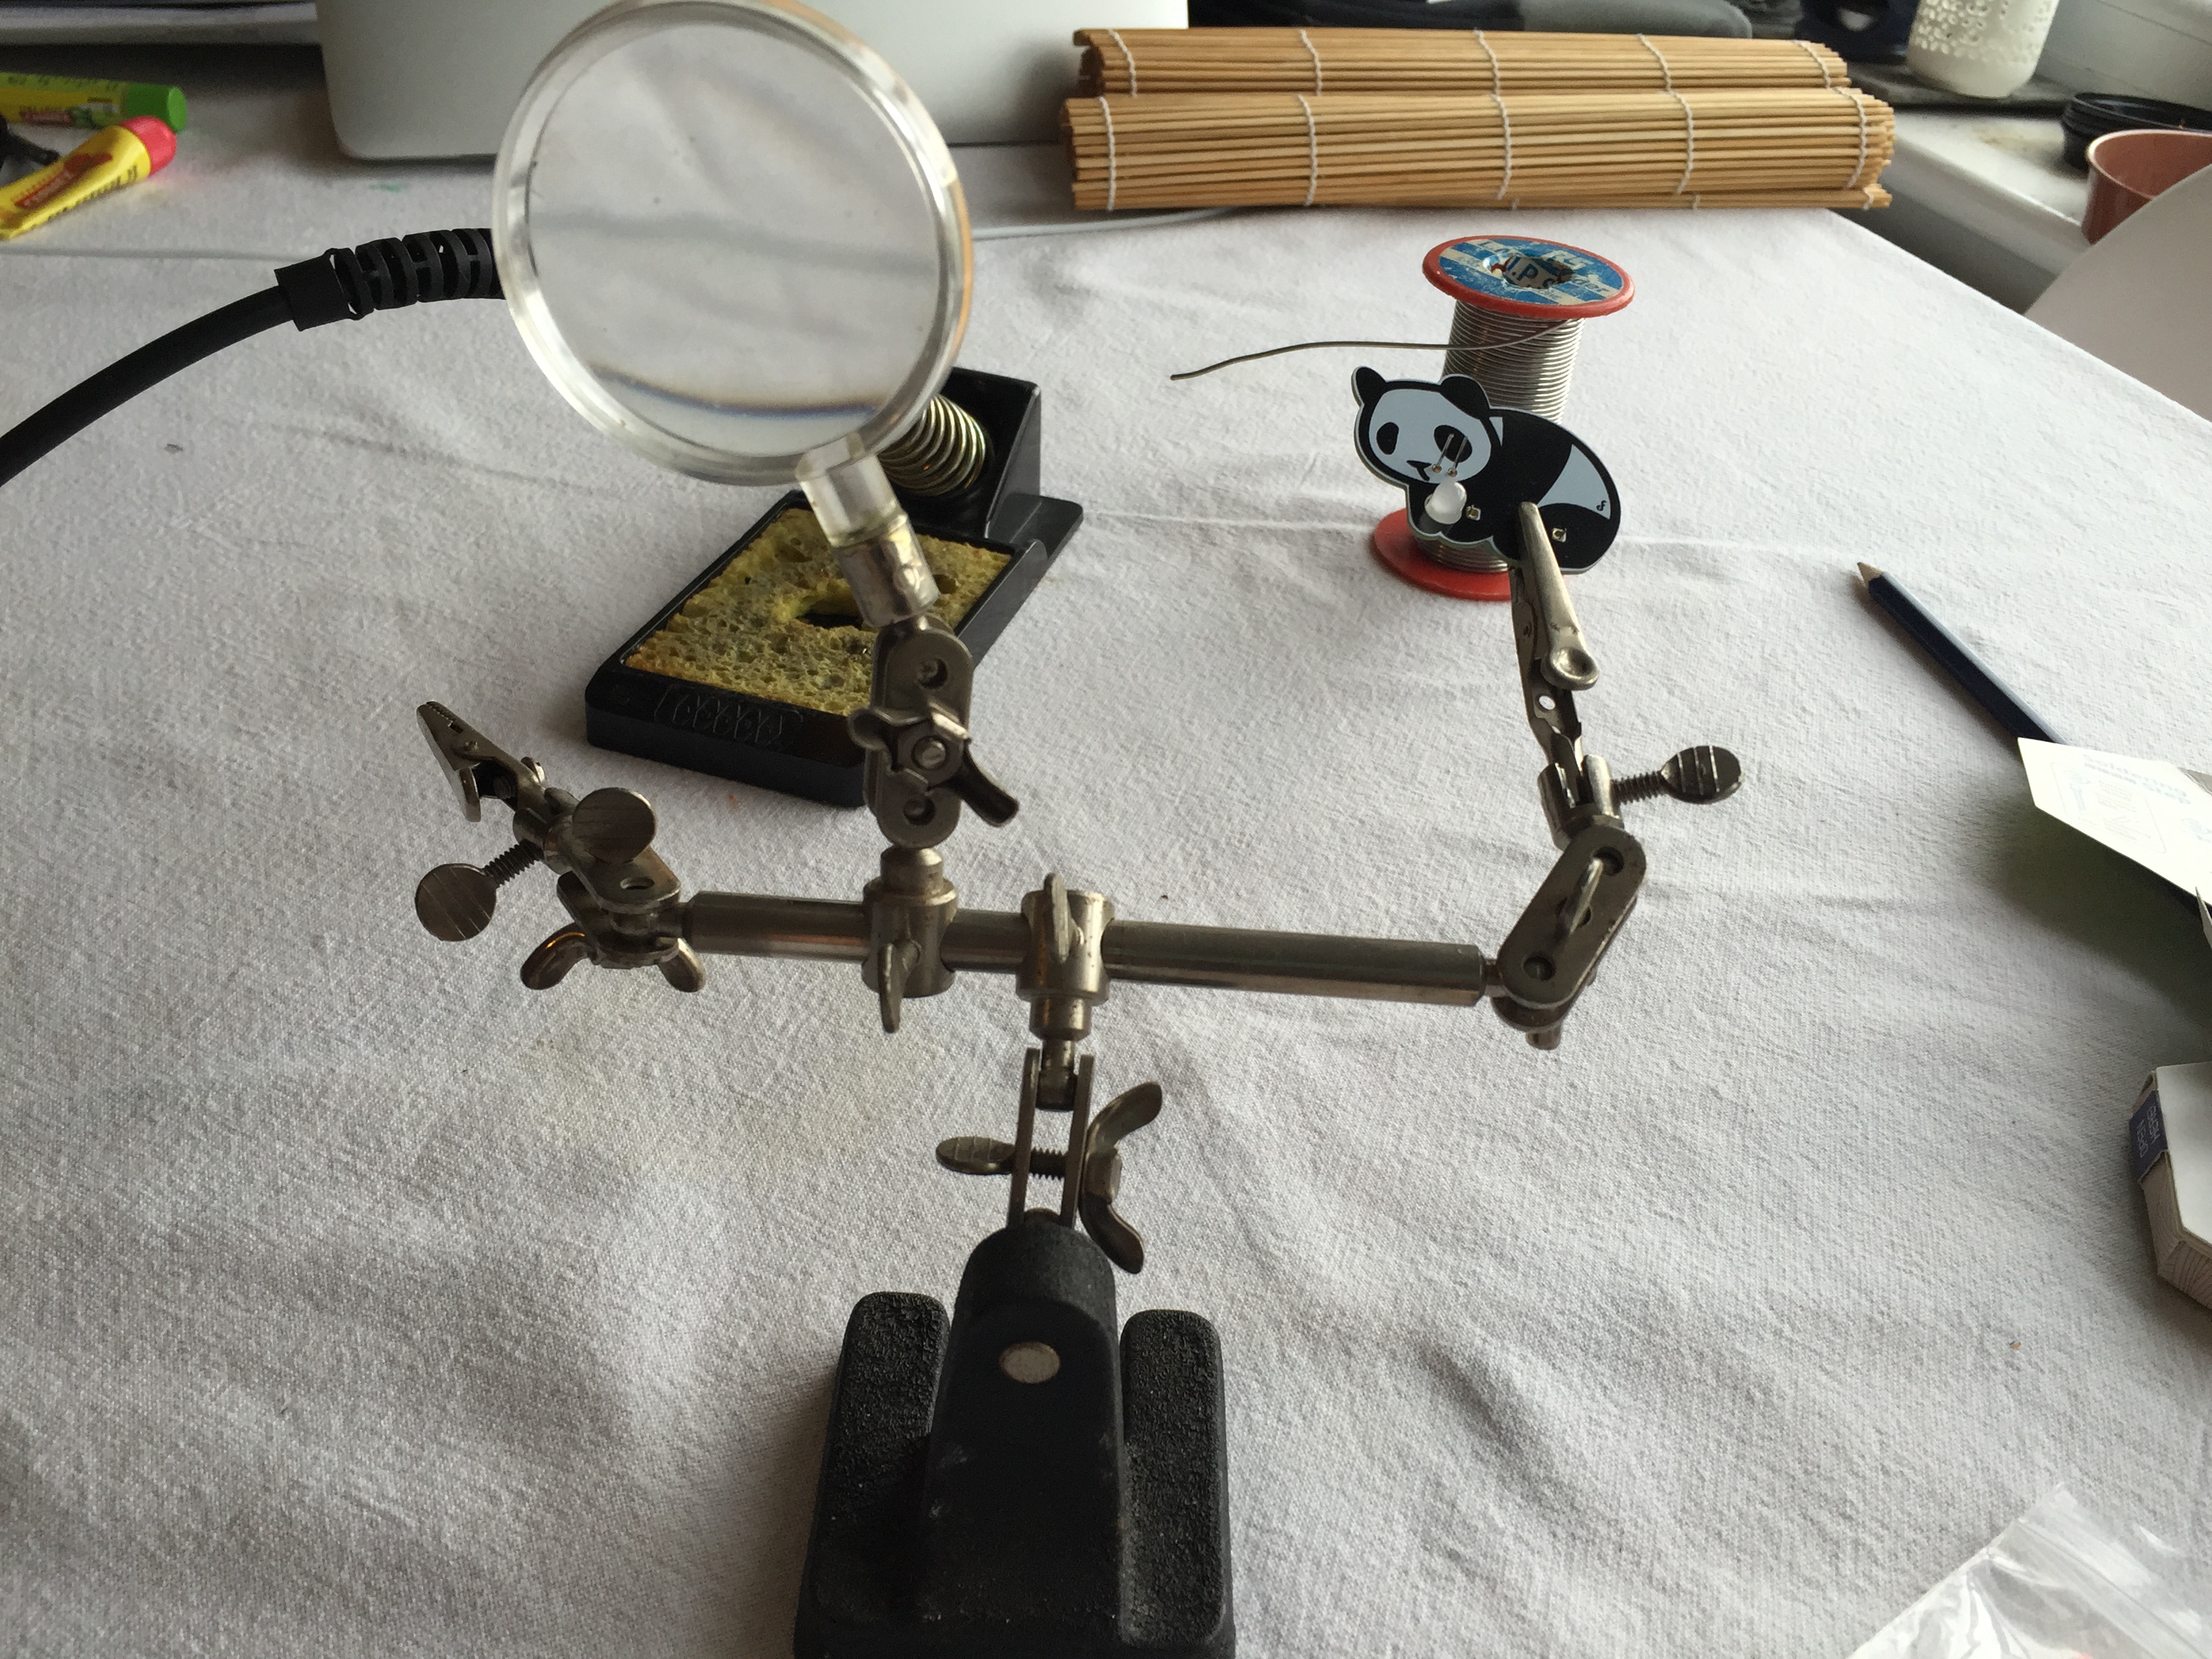
Before starting, Stuart talked me through all of his kit for soldering – he suggested that the bear essentials that you need are a soldering iron, some solder and a stand:The sponge needs to be a little damp before you start and, once the iron is hot, this can be used to clean off excess solder.
Super solderer Stuart also suggest getting a stand for whatever you’re soldering – he says his was about £5 from eBay and he quite rightly points out that this would make soldering easier and safer in schools, but that’s up to you to decide.
Before starting to solder, Stuart showed me the importance of the damp sponge – you can see in the first of these two pictures that the soldering iron is pretty mucky looking, but simply by touching it on the sponge while hot, it becomes clean. He also demonstrated how you can tell that the soldering iron was hot enough – simply by touching the end of the solder to the iron and seeing if it melts. *HEALTH AND SAFETY TIP* when there is melted solder on the end of your iron, it’s very easy to ‘flick’ it off, which is, of course, very dangerous and likely to cause burns – make sure you demonstrate this to children and explain why it’s a bad idea and why you must make sure that you wipe of excess solder onto the sponge!
At this point I was all ready to go, but Stuart once again had a good idea, he suggested having a go at a bit of soldering on some old cable and disappeared into a nearby cupboard, returning with this:
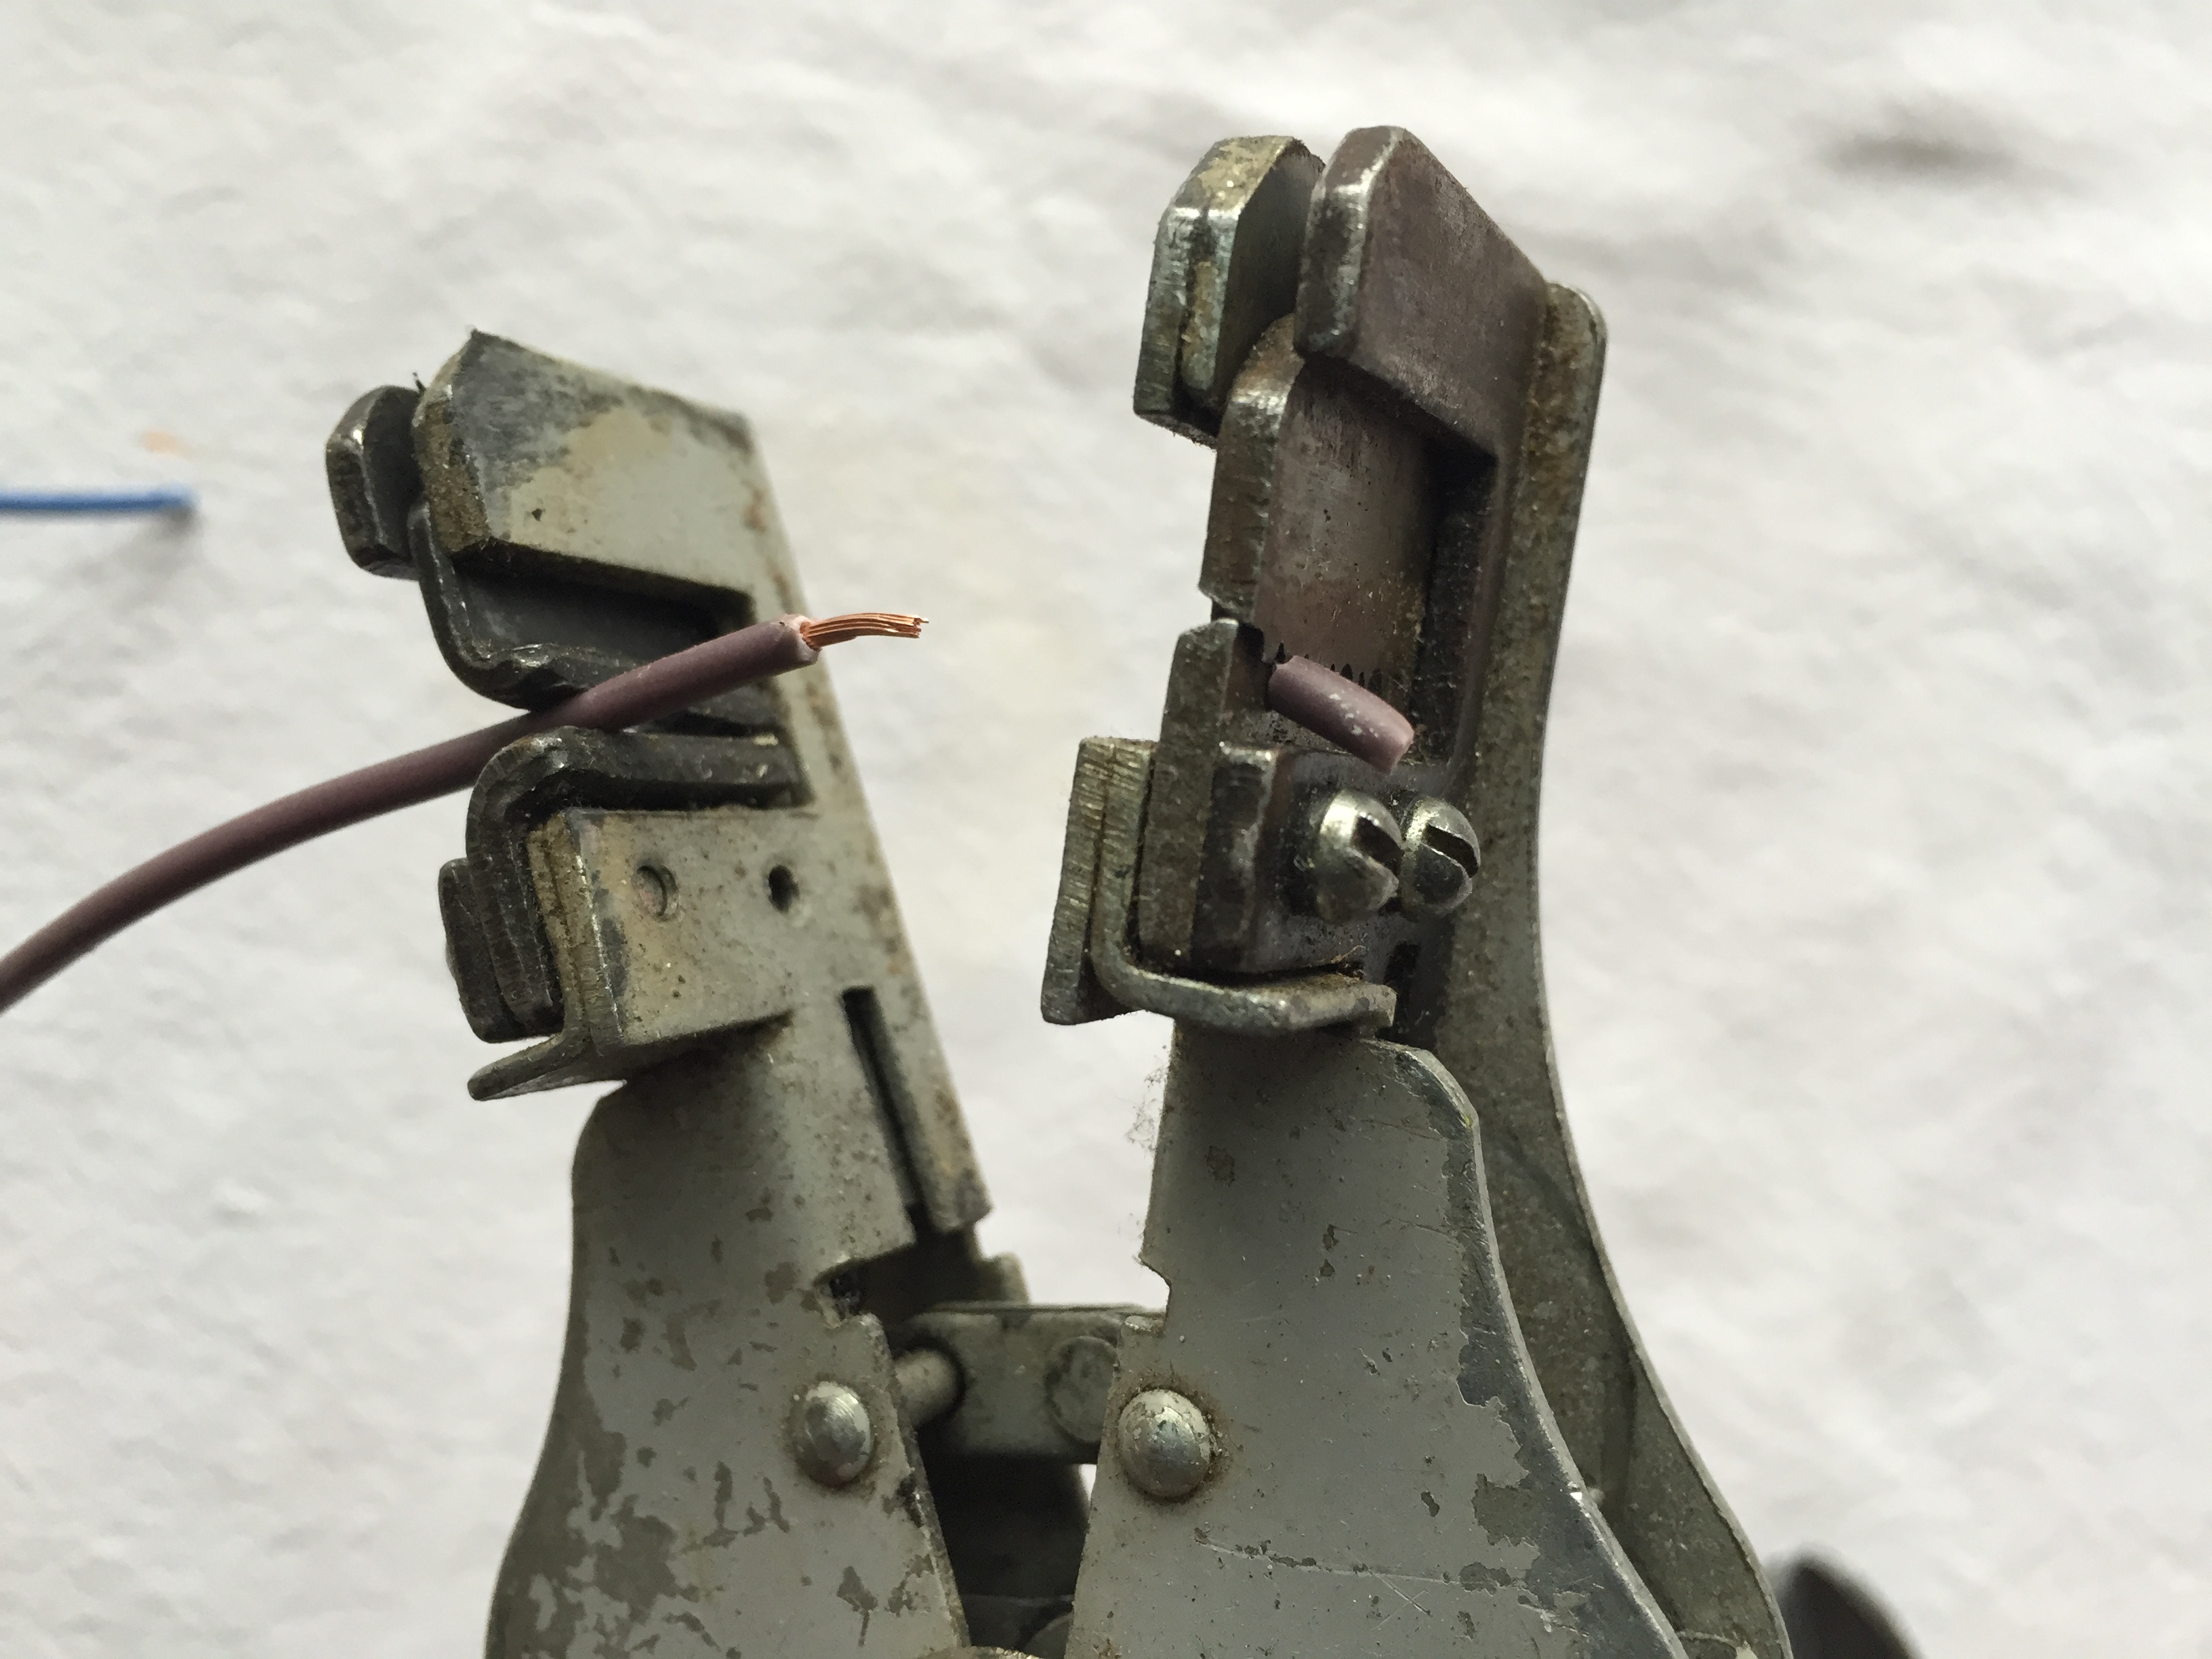
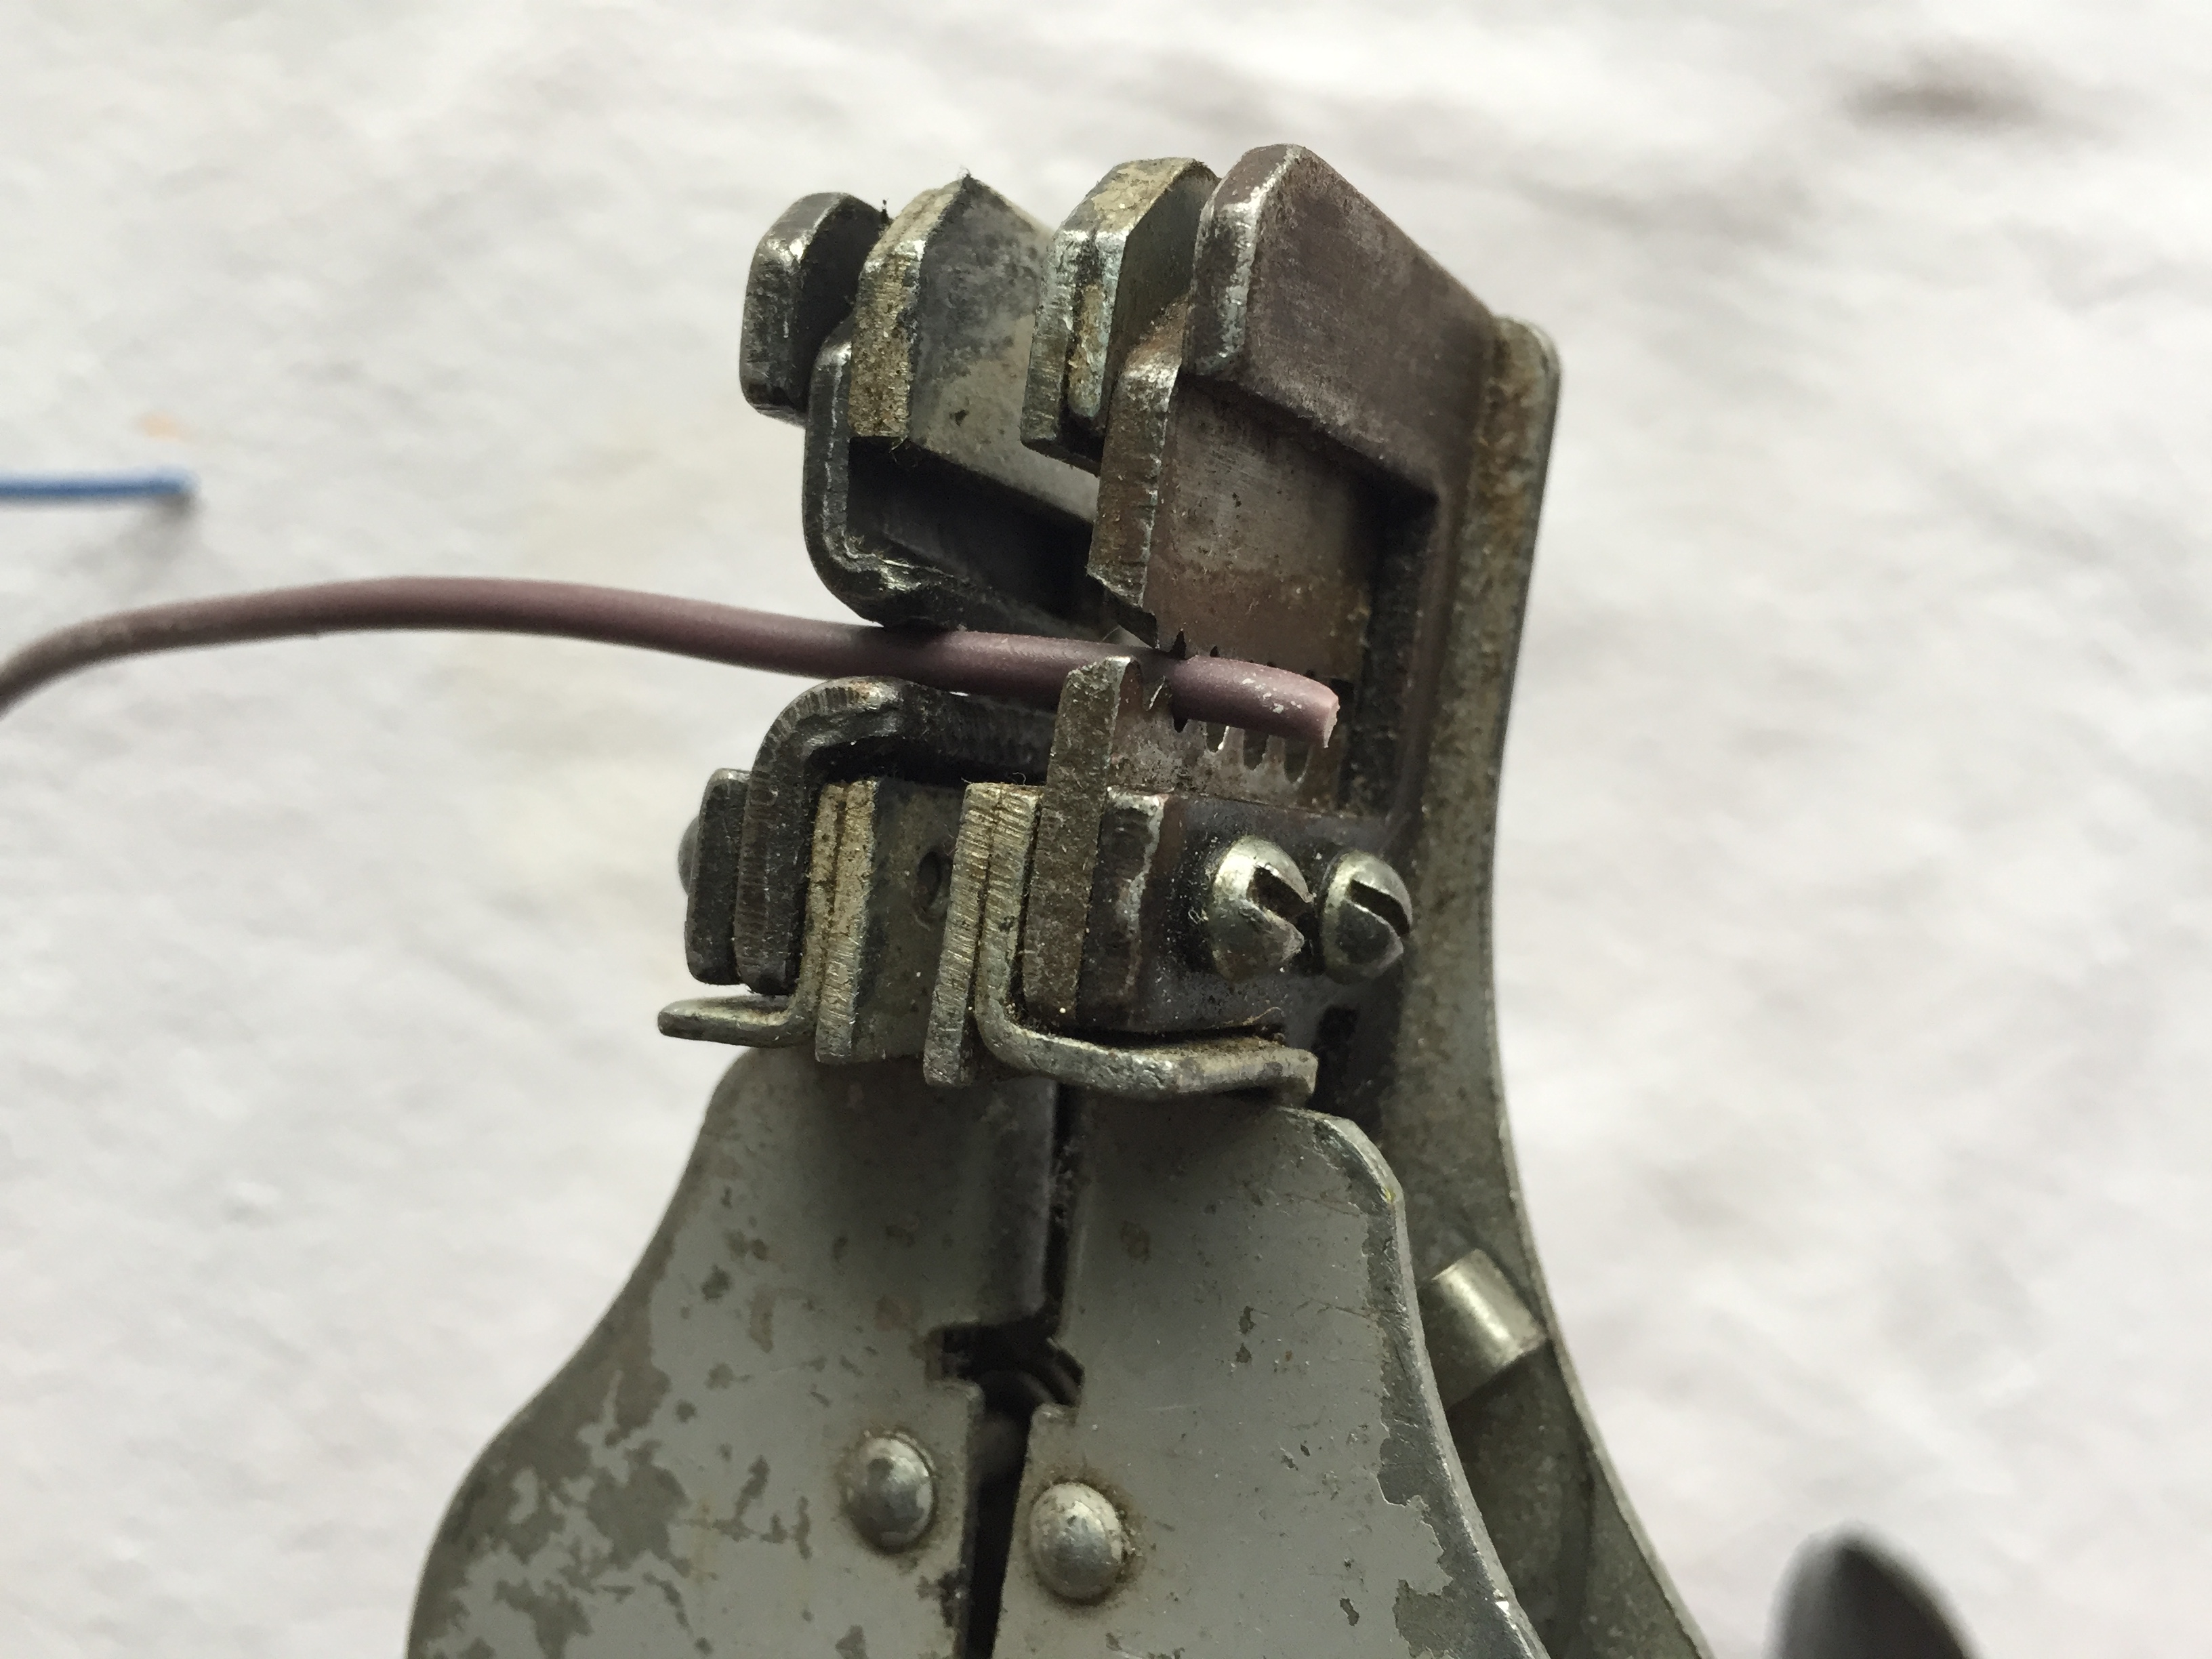
He promptly stripped the end of an old European plug cable that he just happened to have in the cupboard and used a wire stripper to reveal the wires inside.
First I had to twist two of the newly revealed copper ends together, then have my first attempt at soldering – Stuart patiently explained that I needed to heat up the area I wanted to solder with the soldering iron before carefully feeding the solder onto the now hot copper – if it’s hot enough, the solder will melt and spread around the area. You shouldn’t need to touch the solder onto the soldering iron, the heat transference should be enough to melt the solder without the two coming into contact!
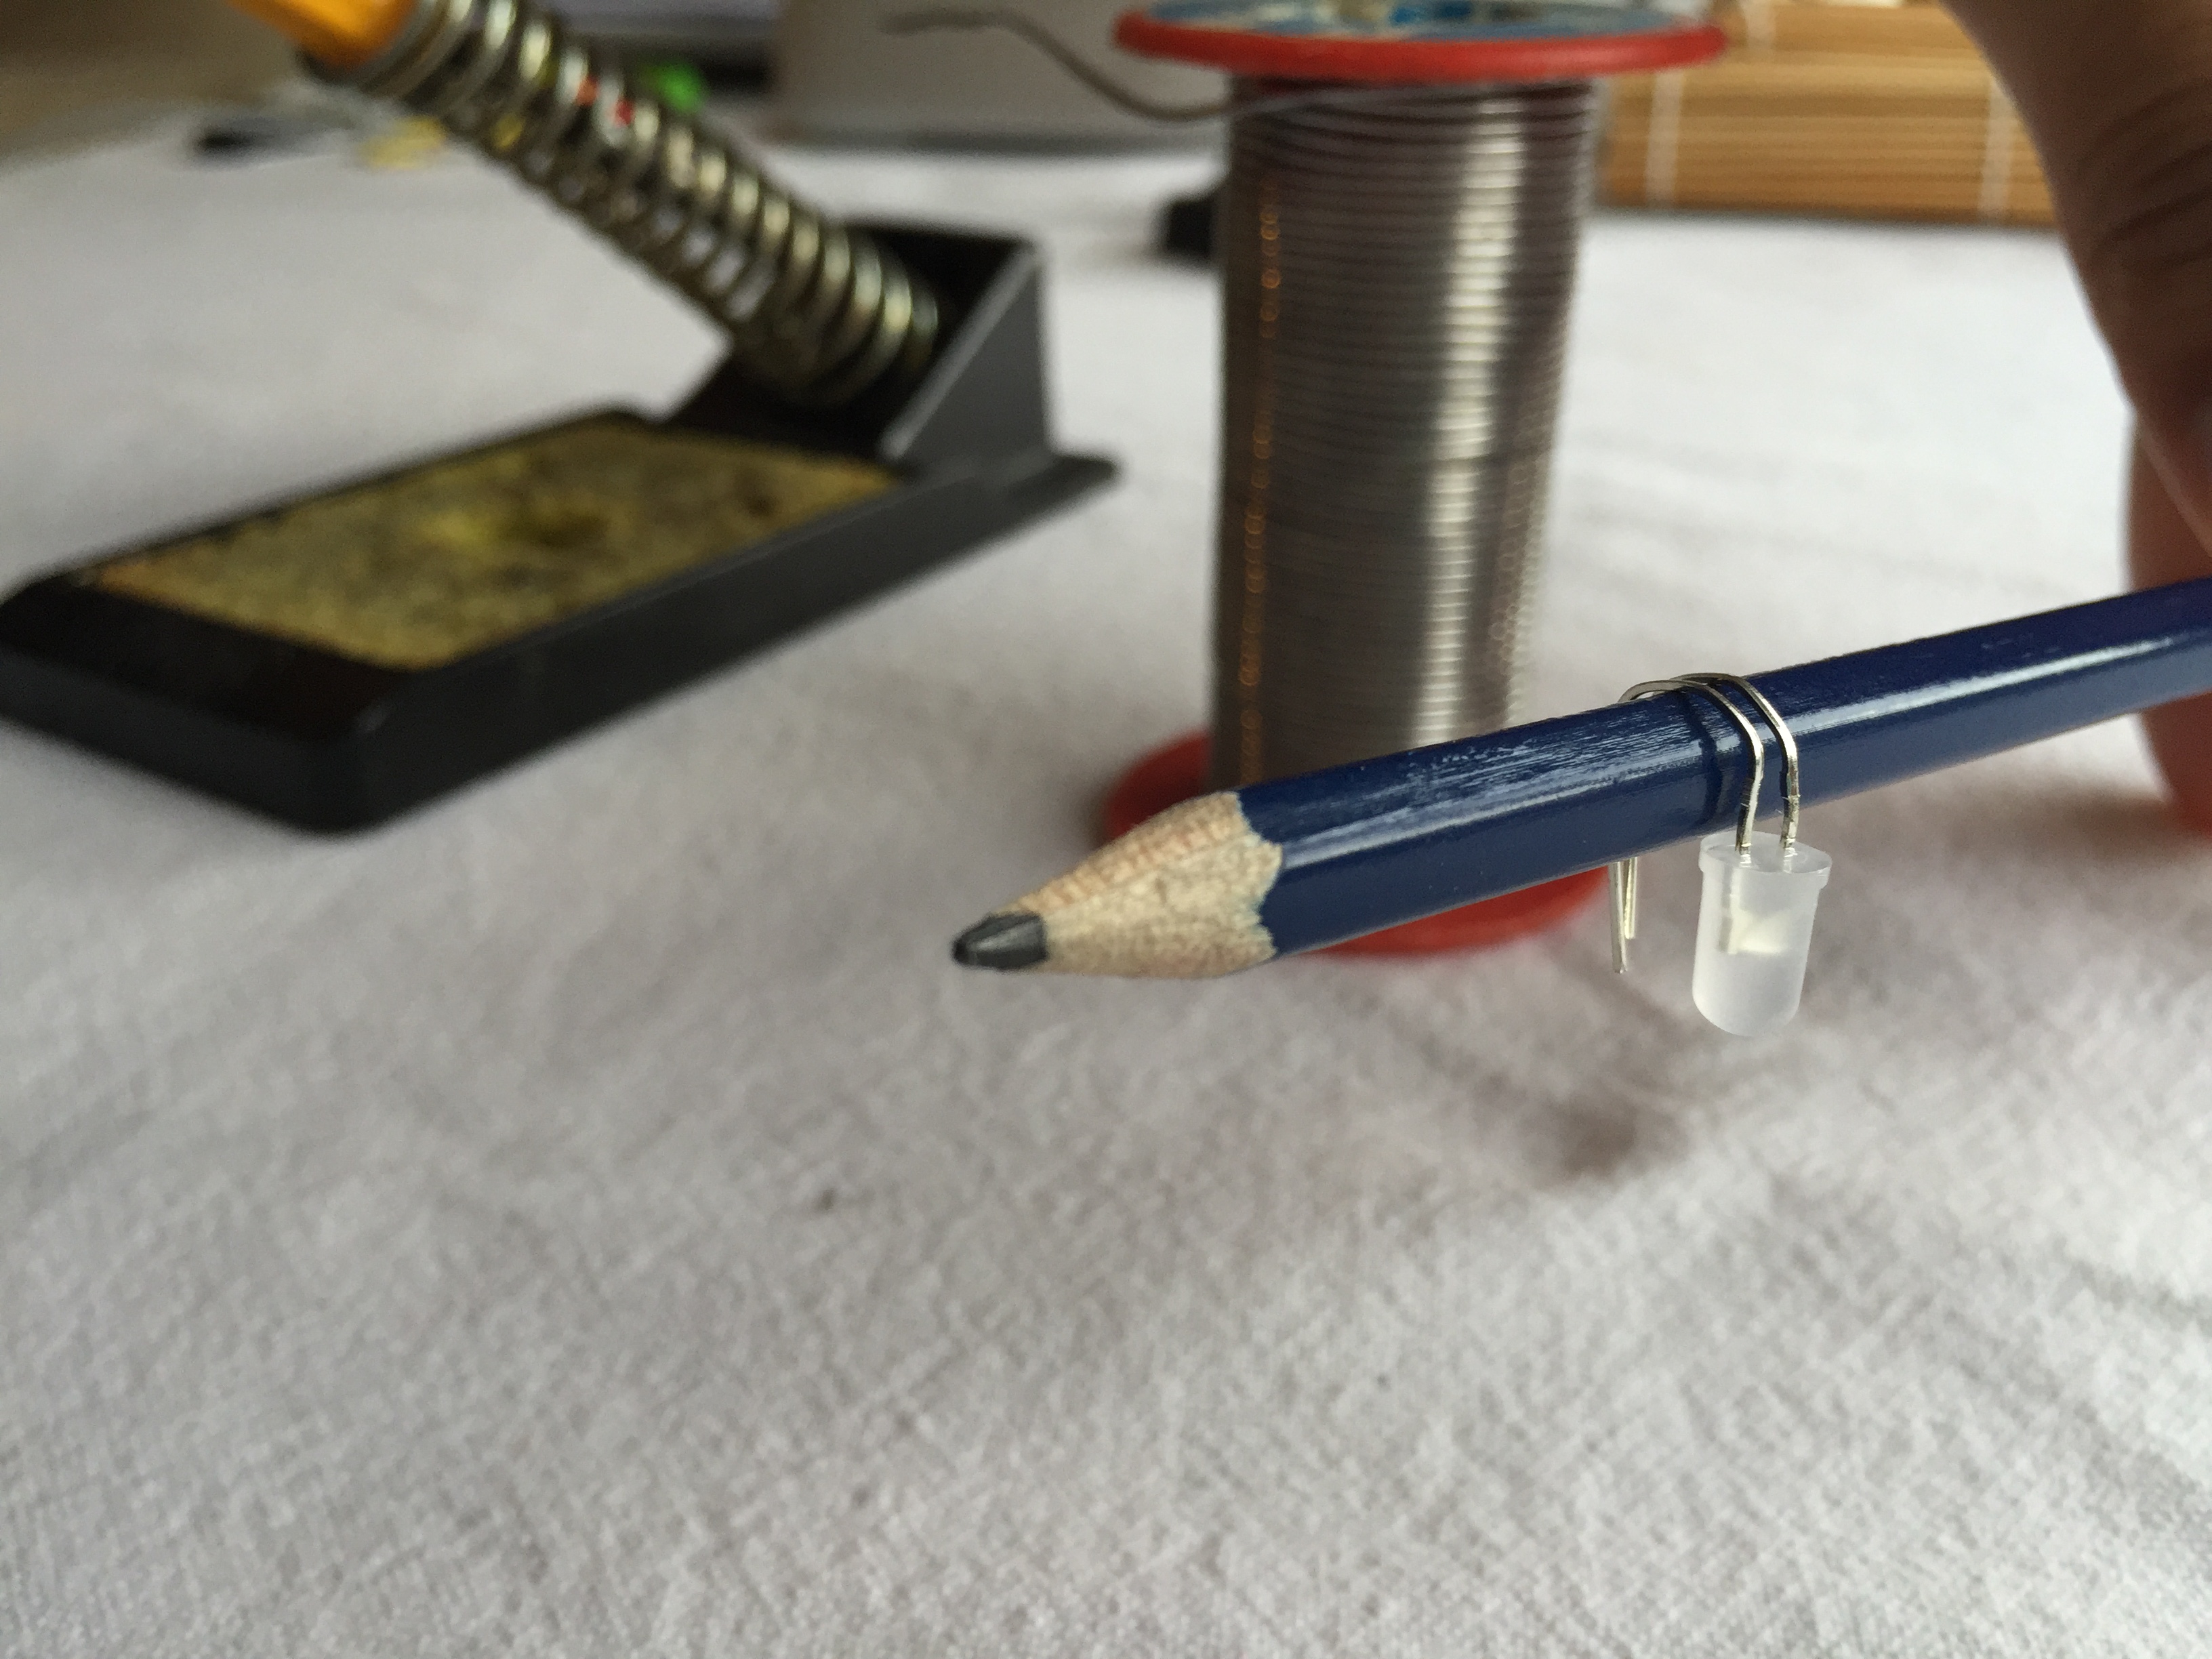
So, my first bit of soldering done, we were ready to start looking at the badges – first step was to follow the instructions and carefully put the battery holder and LED into place. I was happy to just bend the LED to get it through the necessary holes, but once again, Stuart had a good idea and suggested using a pencil to carefully bend it and avoid breaking anything. It’s made really clear on the instructions how to insert the LED and which side of the LED is positive – the only thing that wasn’t clear was which way up to put the battery holder and I did have a moment of putting it on upside down and then having no clue about how it would stay in place (yes, I’m that stupid). Fortunately, once it was pointed out, it did make sense that it would sit upside down, slotted through the holes!
With the two parts resting in the right place, I became really grateful for the stand as trying to solder without it might have been really tricky!
So, here you can see a short video of Stuart soldering the first of the LED pins:
And the finished result:
I’m not going to lie – we were both pretty impressed by the material the badge was made from as it didn’t seem to mind being touched by the soldering iron – this is a nice touch for beginners as it’s likely they will make mistakes and it’s nice to know that you can’t cause to much cosmetic damage!
So, my turn!
I found soldering the pin really scary because I kept thinking that I would short circuit it somehow, but as long as I stuck to carefully heating the LED pin and gently touching it with the solder, everything went to plan. I found out afterwards that if I’d put too much solder on, I could’ve damaged the LED, but everything looked fine and the solder had just slightly come through on the back, which was exactly what we wanted.
The next step was to solder the battery – once again, click here for a handy video of Stuart demonstrating how to solder it.
Unfortunately, that left me with the harder battery pin to solder and this time I really struggled – I was terrified of touching the LED with the soldering iron and found it really difficult to let the pin heat up and gently touch it with the solder, but eventually, after three attempts, I got it done:
After snipping off the excess length on the LED pins, I was ready for the final step, which was to solder on the badge pin – the instructions ask you to put solder onto a patch of the badge and then attach the pin by holding it in place and adding more solder, a process known as ‘tinning’. This time I was really able to see the solder rapidly melt onto the badge – while I held my soldering iron still, the melting solder spread quickly around it; it really did appear as though the badge was sucking the solder from the end of the roll!
Once again the stand made life really easy as I was able to clamp the badge in place in order to apply the last two bits of solder.
The final step in the badge creation was that nice touch I mentioned earlier – to create a display case for your badge! The kit even contains some double sided tape to stick it all together!
So, why is this particular kit useful?
Firstly, it offers you a stress free opportunity to learn to solder – it doesn’t matter if you solder onto the badge, the solder just doesn’t stick to it.
You can’t cause too much damage if you go wrong – of the three bits of soldering you need to do, only one of them actually involves circuitry; both the battery holder and the badge pin are simple attachments rather than completing a circuit.
It looks nice – as an adult, I loved making a cute little badge to wear; I’m going to wear it to school on Monday with pride and show off to my class that I soldered it myself! I really like the display case and I like that the kit itself is so cleverly made with it’s fold out instructions and display case pattern. I think children will really love to make these badges and, if my sense of achievement is anything to go by, will feel really proud of themselves!
It’s affordable – For £2 you can’t really go far wrong and I’m tempted to buy a load for my Code Club as an end of term treat! Yes, you could buy components for cheaper, but this kit really does come with everything you need apart from the actual soldering iron and it’s a nice, safe way to start!
I cannot wait to show these off at my next Coding Evening – so, what’re you waiting for? Go and buy yourself a zoo of soldering badges!
Earlier this week, following on from the success of my previous Coding Evenings, I launched CodingEvening.org to share my idea for free evenings for teachers to learn from experts about how to implement the coding aspect of the new computing curriculum. My reasoning behind this is that I’ve had a few other teachers ask me about how to launch their own evenings so I thought it was worth having a dedicated site to help guide them. I hope that other people are willing to either organise their own or at least get involved if there is one in your local area!
In the last week I was invited to speak at both a Code Club London meetup and a CAS hub in Hammersmith. At the first event I was invited to talk about my Coding Evenings and about getting people involved in helping out in schools. At the latter I spoke to teachers about Raspberry Pi and demonstrated using the PiStop in the classroom. I also went to my first Raspberry Jam in Cambridge and got a chance to meet up with lots of lovely people. I didn’t get there in time to buy any Learn to Solder Zoo Badges from the PiHut, but I did manage to order some and I’m looking forward to writing up a blog about my first attempt at soldering. All praise to Tim and Mike for organising CamJam, it was a fabulous day and I’m so glad I was able to go.
For anyone interested in going, PyconUK have just announced an amazing offer for teachers – the first 40 that turn up will not only get a heavily discounted ticket, but their school will received £200 towards cover costs – what a bargain! Thanks to Nicholas Tollervey for sorting it out. Here’s my blog post about last year’s event. I would thoroughly recommend going if you can – it was really amazing last year.
Finally, if you’re interested in coming, the final Twickenham Coding Evening of the year will be on Wednesday 1st July in the Stokes and Moncreiff in Twickenham as usual. I hope to see lots of you there.