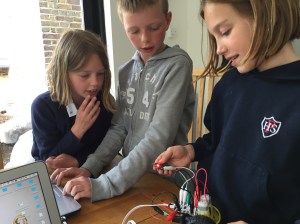
A few months ago, I donated ‘an afternoon of robot building’ to a charity auction and so this weekend I headed out to fulfil my promise.
Last month I tried out the CamJam Edukit, which I absolutely loved, but quickly realised wasn’t necessarily the right tool for using with 9 and 11 year olds so, on the recommendation of the wonderful Nic Hughes, I bought a Crumble Bot from Redfern Electronics.
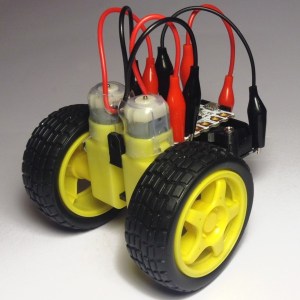
The robot is based around the crumble controller, which is a simple programmable board with simple inputs and outputs.
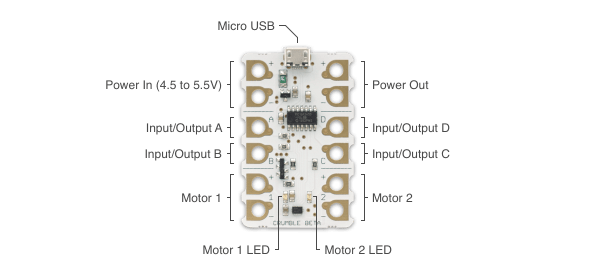
Photo credit redfernelectronics.co.uk
The kit comes with an easy to follow booklet which shows very clearly how to build the robot.
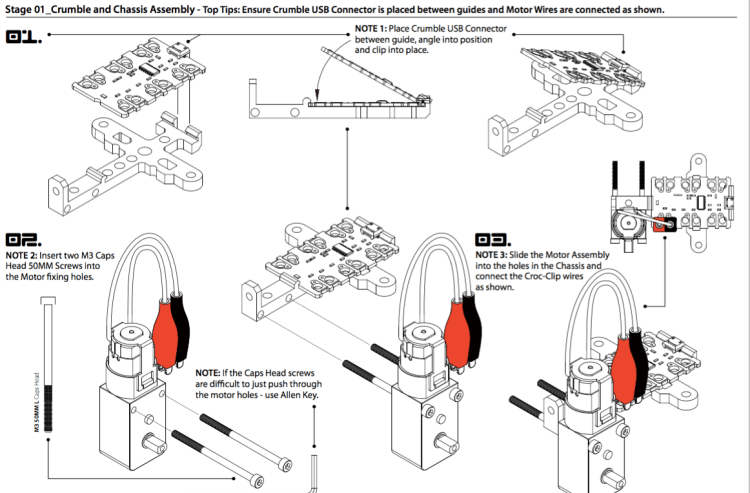
We started off by fitting the Crumble to the base unit – it required a bit of force to push the controller into the base, but with the help of big brother Rupert, Annabelle was able to push it into place.

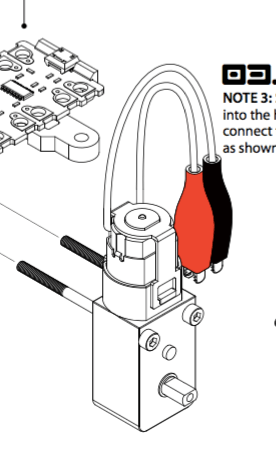
The boys handled screwing bolts through the motors and it was only after they’d screwed both pieces in that we realised that they had fitted them to the motor the wrong way around! As you can see from the diagram, it’s quite important that you put the screws in the right way around, otherwise you can’t attach the wheels later!!
 Alerted to the boys desire to do everything backwards, we kept a careful eye and had to check carefully to ensure that Alexi had put the screw through the base the right way around.

Luckily, we caught it before any further mistakes were made.
The children worked really hard and built their robot in around forty five minutes – we were really impressed with how easy to follow the directions were and how quickly we had a working robot.


Our next job was to work out the Crumble interface. Redfern have created a ‘Scratch-like’ interface to make programming the bot easy and we were really pleased when, after a few seconds, we had a robot moving across the floor.

We’d had some great conversations so far about circuits and the need to ground the motors, we discussed how the controller is used to control the robot and now we were ready to get the robot to draw some shapes on the floor. Once we added a loop in, we discovered there were only two ways to stop the programme running. Either we unclipped a crocodile clip from the battery pack, which wasn’t easy unless we’d removed the slippery protection from the clip and risked a short circuit, or we pushed the stop button on the computer interface, but this only worked while the bot was plugged into the computer. Perhaps a future step for us would be to put in a button which ‘stopped’ the code as it was quite a pain to stop it running otherwise (saying that, it was pretty funny watching Sia dive across the floor and grabbing the robot while frantically pulling out crocodile clips).
 The children worked hard to figure out how to make a square on the floor and had great fun making the bot dance, but there was one more piece of kit in the box. We had one neo pixel ‘Sparkle‘. With no instructions for getting the Sparkle working, we searched the internet to find some instructions. Our vain hope that we’d be able to just drag a ‘set sparkle’ block didn’t work out.
 We tried setting it up in various different ways and, from looking at some diagrams in blog posts, we realised that the arrows on the Sparkle were misleading and didn’t actually tell us where to clip the crocodile clips, but were to let users know how to set up the Sparkles in series.

I would’ve liked there to be clearer information about how to clip in the the Sparkle and how to programme it as it took us a long time to figure out – the information is there, but it wasn’t as easy for us to find as I would’ve liked.
We eventually found some code which included the block ‘let ‘t’ = 0′ and so we tried dropping a block in the beginning of our code and this seemed to do the trick, so now our robot both drew a square and had a red sparkley light. 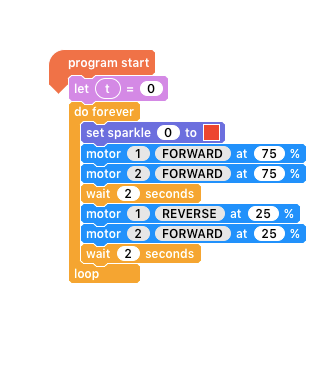
I’ve now been told by Redfern that we shouldn’t have needed the variable block to get the sparkle working so who knows what we were doing wrong!
One other issue we struggled with was that the Sparkle tended to flicker between colours for no apparent reason – to be honest, the children actually quite liked this; it wasn’t intentional and is perhaps a hardware fault that could be improved on, but nothing to worry about.
I admit to a moment of indulgence at this point – I wanted to see if I could make the Sparkle phase through different colours and so I tried the following code:
 I was pretty pleased when the bot went through blues, pinks and reds as it drew its square and I’d love to have time to further develop this code!
Anyway, we had a super afternoon building our Crumble Bot – the children were pleased with their robot and had just as much fun coming up with code for it as they did building it in the first place. I would thoroughly recommend this for primary school teachers as the robot could easily be dismantled and rebuilt and it was great fun to do – it really emphasised the importance of physical computing to make coding relevent and fun. The Scratch-like interface for programming the robot was mostly intuitive and easy to use (although the sparkle code needs work) and the children quickly managed to achieve their goals with very little input from me. I’ve seen some wonderful projects where teachers have used this robot as a base, but have built and designed their own chassis as a DT project. It is a great way to get started with robot building in the primary school and then, once the children are more confident they can move on to more challenging projects such as the CamJam kit.
I’m really excited to see this robot in the classroom so I hope you give it a go!


Thank you to the parents of the children involved for allowing me to use photos of their children in this post.
