When you first invest in a Raspberry Pi, there are a few things you need to know:
Firstly, if you buy a Pi, you are just buying the little circuit board bit, which looks a bit like this:

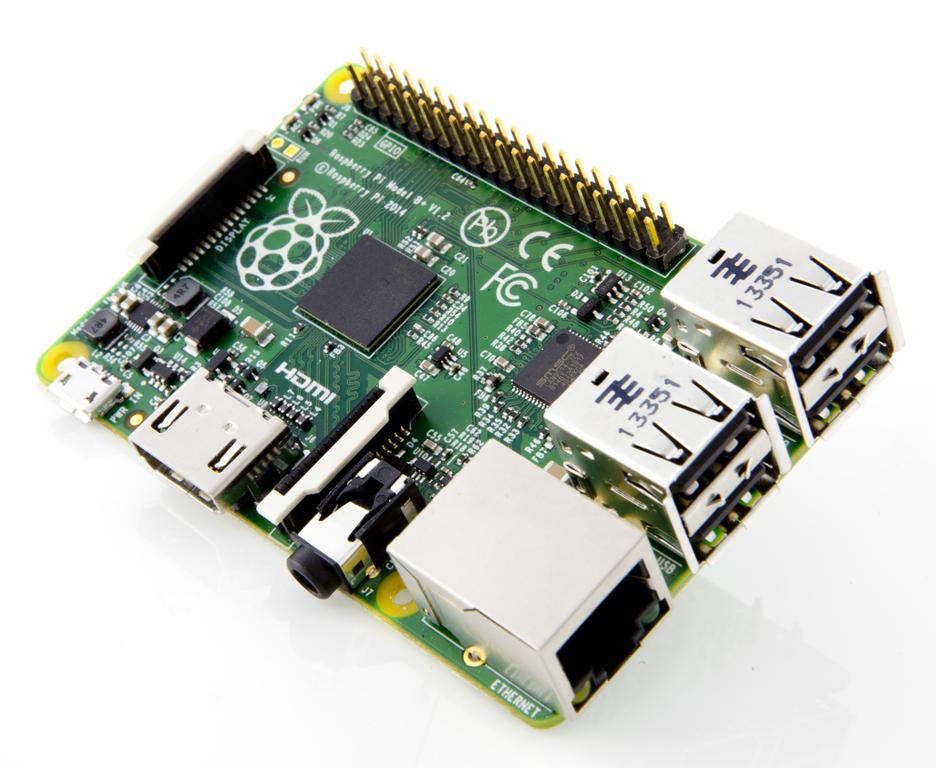
Most people who already own a Raspberry Pi will probably have the first of these pictures, which is called the model B, however, as of last week, new buyers should be aiming to get their hands on the model B+, which is a significant improvement on the B.
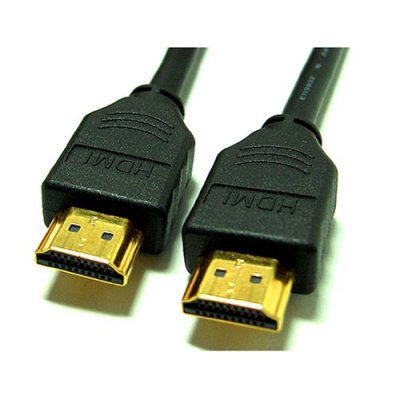
So, let’s say you bought your Raspberry Pi from CPC, all you have bought for yourself is the basic board and without a few bits and pieces, there isn’t much you can do with it. You NEED a power supply, you NEED a memory card, you NEED something to display your Pi on and you need a mouse and keyboard! So, while we’re told it’s a computer that costs about £25, in reality you need to spend a bit more than that. If this is your first time on the rodeo, I suggest getting something like this kit from Pimoroni, which gives you everything you need, including the Pi and a case (a must have when working with children). The only thing that you’ll need on top of that is an HDMI* monitor/tv/projector.
* if you’re not 100% certain, most projectors and monitors for the last ten years+ have been VGA, newer televisions and monitors tend to have an HDMI connection which basically allows you to view things in HD or high density. HDMI cables look like this so please check that your monitor/tv/projector works with them:
Having said that, I’ve just been messaged by a fellow picademy alumni, Laura, who has pointed out that it is fairly inexpensive to purchase an HDMI to VGA adapter if your monitor doesn’t have the right kind of ports so don’t panic if this is the case!
The Raspberry Pi model B takes a standard SD card whereas the B+ takes a mini SD card – I would recommend that you buy your SD from Raspberry Pi (or somewhere like Pimoroni) so that you get the latest operating system and don’t have to spend time downloading and installing it on your card. Don’t make the mistake that I did and get your kit from Maplin – it seems tempting, but compared to the authorised dealers such as Pimoroni and CPC, you just won’t get the same kit for your cash.
The next thing you need to figure out is where to plug all of your bits and pieces. If you have a model B then you will need a USB hub in order to get everything plugged in, whereas the B+ has enough USB ports on it to not need the extra bit.
If you want to connect to the internet you will need to either invest in a wifi USB stick or plug it in via ethernet cable (the grey cables that run from the wall into the back of your computer and provide internet connection). I would recommend the wireless (wifi) option, just so you have less cables hanging around – it is helpful to be connected to the internet so you that you can download software, but more on that later.
Once you have your Pi setup then you’re ready to go start using it for fun and exciting projects.

SD Card Setup – for information on how to prepare the SD Card used to boot your Raspberry Pi.
LikeLike
I’ve been updating my SD cards this week and found that the best information was on the Pi website itself – I downloaded Raspbian rather than Noobs, since I knew that was the operating system I wanted to use, then followed the instructions here: http://www.raspberrypi.org/documentation/installation/installing-images/README.md
LikeLike